Affiliate Disclosure: This post may contain affiliate links. If you purchase through links on our site, we may earn an affiliate commission at no extra cost to you.
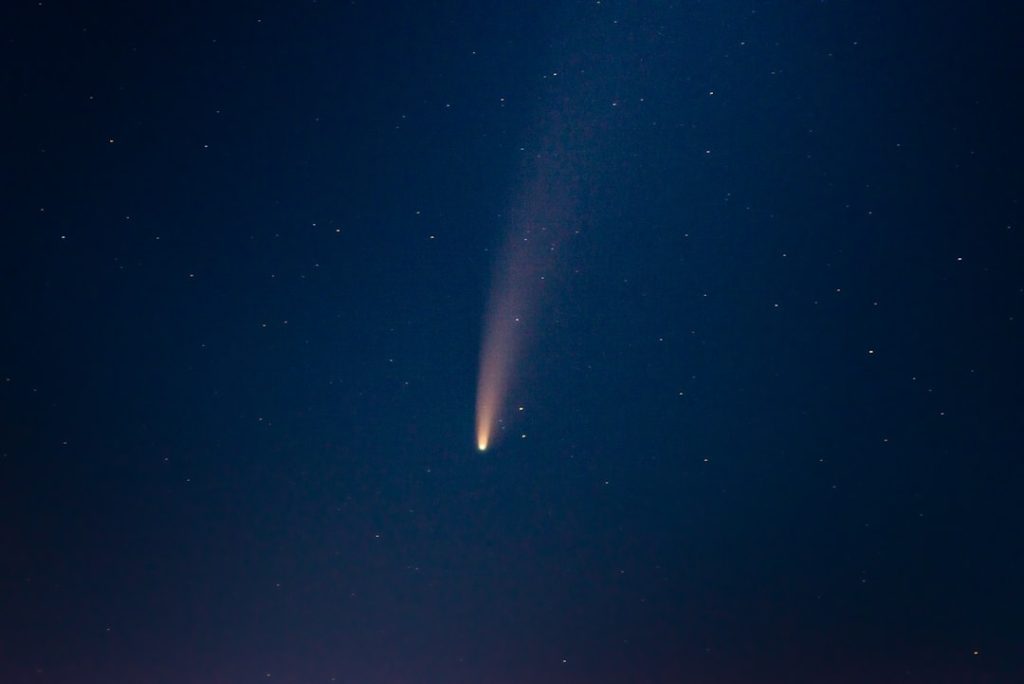
Capturing the dazzling spectacle of a comet can be an exhilarating experience. Imagine standing under the night sky, your camera poised to capture the cosmic dance of light and dust.
But here’s the secret: the magic lies in the settings you choose. With the right camera settings, you can transform a fleeting celestial event into a stunning photograph that you’ll cherish forever. Curious about how to achieve that? You’re in the right place.
This article will guide you through the best camera settings for photographing a comet, ensuring your shots are nothing short of breathtaking. So, if you’re ready to elevate your astrophotography game and capture the universe’s wonders, keep reading!
Choosing The Right Equipment
Capturing a comet requires selecting the right camera settings for stunning results. Use a tripod for steady shots. Set a low ISO to reduce noise. Adjust exposure time for capturing comet tails clearly. Experiment with aperture settings to control light and focus.
Capturing the beauty of a comet streaking across the night sky is a thrilling experience. Choosing the right equipment plays a crucial role in ensuring you get the best possible shot. From camera type to lens selection and essential accessories, each component can make a significant difference in your astrophotography journey.
Camera Type Considerations
When selecting a camera for comet photography, consider one that performs well in low-light conditions. Digital SLRs (DSLRs) and mirrorless cameras are popular choices among astrophotographers. They offer the flexibility of interchangeable lenses and manual settings, which are essential for capturing detailed images of the night sky. A camera with a high ISO range can be beneficial. It allows you to capture faint details without introducing too much noise. Remember, a full-frame sensor can capture more light, providing better image quality and less noise in your photos.
Lens Selection Tips
Selecting the right lens is just as important as choosing your camera. A fast lens with a wide aperture, such as f/2.8 or lower, is ideal for comet photography. It allows more light to reach the sensor, making it easier to capture the faint details of a comet’s tail. Consider using a lens with a focal length between 14mm and 200mm. A wide-angle lens can capture the comet along with a stunning landscape, while a telephoto lens can help you zoom in on the comet’s details. Experimenting with different lenses can help you find the perfect balance for your shot.
Essential Accessories
To enhance your comet photography, a sturdy tripod is essential. It keeps your camera steady, allowing for longer exposures without blurring. Without it, even the slightest movement can ruin your shot. A remote shutter release or intervalometer can also be invaluable. It helps to avoid camera shake when you press the shutter button, ensuring sharp images. Additionally, carrying spare batteries and memory cards is always a good idea. Cold nights can drain batteries quickly, and you don’t want to miss a shot due to lack of storage. Have you ever been out on a cold, clear night, only to realize you forgot an essential piece of gear? Preparing your equipment beforehand can make all the difference. Consider what tools you might need to capture that perfect comet image and ensure they are packed and ready for your next adventure.
Optimal Camera Settings
Capturing a comet’s beauty can be a challenge for photographers. The right camera settings are crucial to getting the perfect shot. Comets are fast-moving and often appear faint in the night sky. This makes it essential to adjust your camera settings for optimal results. Let’s explore the best settings for capturing clear and stunning images of comets.
Iso Settings For Clarity
Adjusting ISO settings can enhance image clarity. A higher ISO can brighten faint comet tails. However, too high may introduce noise in your photo. Start with ISO 800 and adjust based on the comet’s brightness. Balance is key to clear, detailed images.
Aperture Adjustments
Aperture settings control light entry into the camera lens. Use a wide aperture, like f/2.8, for brighter images. This helps capture more light from the comet. A wider aperture also enhances focus on distant objects. Adjust to f/4 if stars appear blurry.
Shutter Speed Insights
Shutter speed affects how motion is captured in your photos. Longer exposures capture comet trails beautifully. Try a shutter speed of 10 to 20 seconds. This allows more light to reach the sensor. Adjust based on the comet’s speed and brightness.
Focusing Techniques
Capturing a comet demands precise camera settings. Use a wide aperture for light capture. Set a long exposure to highlight the comet’s tail. Adjust ISO to reduce noise while maintaining clarity.
Capturing a comet’s enchanting journey across the night sky can be a mesmerizing experience. But achieving that perfect shot requires mastering focusing techniques. With the right approach, you can highlight the comet’s brilliant tail and intricate details, making your photograph a stunning piece of celestial art. Let’s delve into two focusing methods that can elevate your comet photography: manual focus and utilizing live view.
Manual Focus Benefits
Manual focus gives you control over your camera’s lens. This can be especially important when photographing a comet against the vast night sky. Autofocus might struggle to lock onto the comet due to low light and lack of distinct edges. When you use manual focus, you can fine-tune your settings until the comet appears sharp and clear. This technique can be a game changer when other methods fall short. Try adjusting the focus ring slowly while peering through the viewfinder. You might discover a sweet spot where the comet pops against the dark backdrop. Have you ever noticed how a slight tweak can transform a blurred object into a masterpiece?
Utilizing Live View
Live View mode can be your best friend when photographing comets. This mode allows you to see your shot on the camera’s screen instead of through the viewfinder. It offers a magnified view, enabling precise adjustments. Sometimes, the comet might be faint, making manual adjustments challenging. Live View can zoom in on the comet, helping you get a better focus. Consider using Live View to spot subtle details like the comet’s tail. Isn’t it fascinating how technology can bridge the gap between what’s visible to the naked eye and the camera lens? Remember, patience is key when using Live View. Take your time to ensure the comet is sharply in focus. Have you ever wondered how much more rewarding the photo becomes when you invest a little extra effort? These focusing techniques can significantly enhance your comet photography. By mastering manual focus and using Live View, you can capture the comet’s beauty with precision. Why not give these methods a try during the next celestial event? You might be surprised at the results.
Composing The Perfect Shot
Capturing a comet requires skill and creativity. The perfect shot combines technical precision with artistic vision. Composition plays a crucial role in making your comet photographs stand out. By carefully arranging the elements within your frame, you can create a striking image that captures the beauty of the celestial phenomenon.
Framing The Comet
Start with a wide-angle lens to capture the entire scene. This lens helps to include the comet and surrounding sky. Position the comet off-center for a more dynamic composition. This technique follows the rule of thirds, providing balance to your photograph. Experiment with different angles and perspectives. This approach can reveal unique views of the comet.
Incorporating Foreground Elements
Foreground elements add depth and context to your comet photos. Trees, mountains, or buildings can frame the comet beautifully. These elements should not overshadow the comet. They should complement it. Choose foreground subjects that enhance the overall composition. This inclusion creates a story within your image. Use a small aperture to keep both the foreground and comet in focus. This setting ensures a sharp and clear photograph.
Timing And Location
Capturing the beauty of a comet requires precise timing and a strategic location. Comets appear rarely, and each sighting can differ in brightness and position. Understanding the best times and places to photograph them can enhance your experience.
Ideal Shooting Times
The best time to photograph a comet is during twilight. This period offers a balance between ambient light and visibility. Early morning and late evening are prime times. The sky is dark enough to highlight the comet’s glow. Check astronomy apps for comet forecasts. They provide specific times for visibility.
Best Observation Spots
Choose a location away from city lights. Light pollution can diminish a comet’s visibility. Rural areas or elevated spots offer clearer skies. Mountains and open fields are excellent choices. Ensure you have an unobstructed view of the horizon. This allows for a full view of the comet’s path.
Credit: tokinalens.com
Post-processing Tips
Capturing stunning images of comets requires more than just the right camera settings. Post-processing plays a crucial role in transforming your raw images into breathtaking visuals. By refining your photos, you can reveal intricate details and enhance the natural beauty of the comet. Dive into these post-processing tips to elevate your astrophotography skills.
Basic Editing Techniques
Start with cropping your image to focus on the comet. This removes distractions and highlights the main subject. Adjust the exposure to ensure the comet stands out against the dark sky. Use the contrast setting to bring depth to your image. This will help the comet’s tail appear more vivid. Adjust the white balance to make the colors more accurate.
Enhancing Comet Details
To bring out the comet’s details, enhance the sharpness. This helps define the structure and texture of the comet. Consider using a noise reduction tool to smooth the sky. This keeps the comet clear and the background clean. Enhance the brightness and saturation of the comet’s tail. This makes the colors more lively and eye-catching. Use layer masks to apply adjustments selectively.
Frequently Asked Questions
What Are The Best Camera Settings For Shooting Comets?
For capturing comets, use a wide aperture like f/2. 8 to f/4 for better light intake. Set ISO between 800-1600 for sensitivity. Opt for a long exposure, around 10-30 seconds, to capture the comet’s trail. Use manual focus to achieve sharpness, and stabilize your camera with a tripod.
How Do I Focus My Camera On A Comet?
To focus on a comet, switch to manual focus mode. Use your camera’s live view to magnify the comet and adjust focus until the comet appears sharp. Ensure your camera is stable, preferably on a tripod, to avoid blurring. Verify the sharpness by checking the image preview after shooting.
Which Lens Is Ideal For Comet Photography?
A wide-angle lens, like 14mm to 35mm, is ideal for comet photography. It captures expansive sky views, enhancing the comet’s trail. Fast lenses with wide apertures, like f/2. 8, allow more light, vital for night photography. Ensure the lens is compatible with your camera and offers good optical quality.
What Iso Should I Use For Comet Photos?
Use an ISO setting between 800-1600 for comet photography. This range balances sensitivity and minimizes noise. High ISO settings help capture faint comet details in low-light conditions. Always review your camera’s capabilities to ensure the selected ISO produces clear, detailed images without excessive grain.
Conclusion
Capturing a comet requires patience and the right settings. Use a low ISO to reduce noise. A wide aperture helps gather more light. Set a long exposure to capture the comet’s tail. Experiment with your camera’s settings for the best results.
Check your focus by zooming in on the stars. Use a tripod to avoid blurry images. Practice makes perfect, so keep trying. Soon, you’ll capture stunning comet photos. Keep your camera ready and enjoy the night sky!