
Imagine this: you’re all set for a movie night or a crucial video call, but suddenly, your computer flashes an error message that says, “No Audio Output Device is Installed.” Frustrating, right?
You’re not alone. This common issue can turn your smooth digital experience into a silent struggle. But don’t worry—there’s a way out! In this guide, we’ll unravel the mystery behind this pesky problem and walk you through simple, effective solutions.
Stick with us, and you’ll be back to enjoying your audio in no time. Curious about how to fix it? Let’s dive in and get your sound back on track!

Credit: www.youtube.com
Check Audio Device Connections
Encountering the “No Audio Output Device is Installed” error on Windows 10 can be frustrating. Checking your audio device connections is a simple first step to resolve this issue. Ensuring that all cables and connections are secure can often restore sound functionality. Let’s explore how to verify these connections effectively.
Check Physical Connections
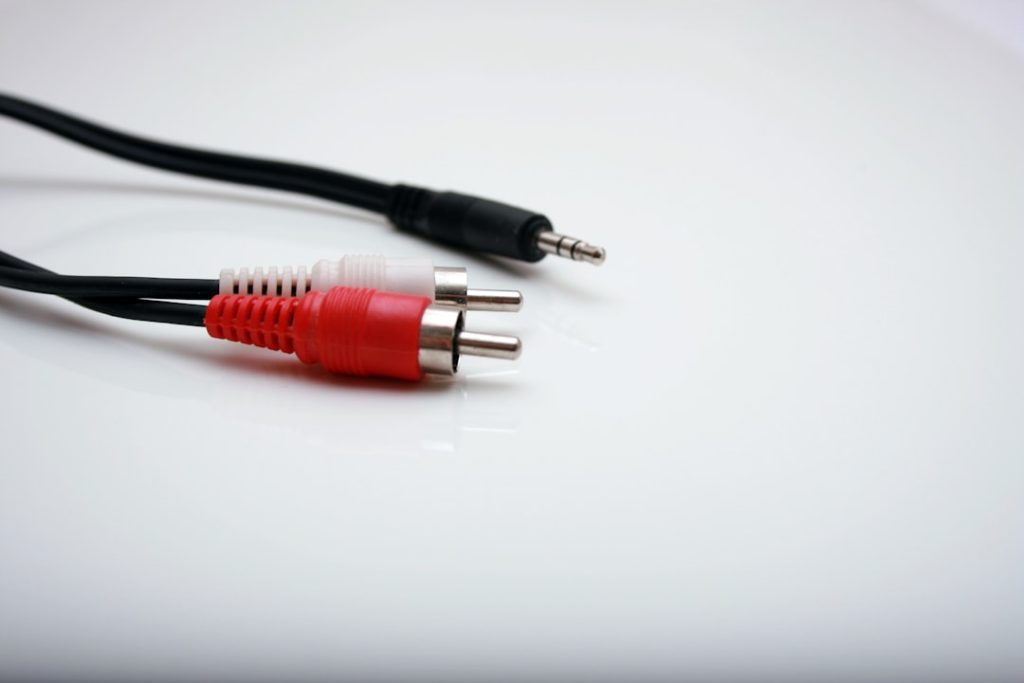
Inspect all cables connected to your computer. Verify that the speakers or headphones are plugged in correctly. USB audio devices should be inserted firmly into the USB ports. Loose connections can often cause audio issues.
Inspect Audio Ports
Audio ports can collect dust over time. Use a soft brush to gently clean them. Ensure no debris obstructs the connection. A clean port ensures better contact with audio plugs.
Try Different Ports
If your device has multiple audio ports, try using a different one. Sometimes, a single port may be faulty. Using another port can quickly determine if the issue lies with the hardware.
Check Wireless Connections
Using Bluetooth audio devices? Ensure they are paired correctly with your computer. Check if the device is within range and has sufficient battery life.
Restart Audio Devices
Unplug your audio devices and plug them back in. Restarting the connection can reset the audio settings. This simple step can often resolve minor issues.
Verify Device Settings
Access your computer’s sound settings. Ensure your audio device is selected as the default output device. Incorrect settings can prevent sound from playing.
Update Sound Drivers
Experiencing the dreaded “No Audio Output Device is Installed” error on Windows 10? Updating sound drivers can often resolve this issue. Sound drivers are crucial software components. They enable your computer’s audio system to communicate properly with Windows. Outdated or corrupted drivers can lead to audio problems. Updating them can restore sound functionality effectively.
Check Current Driver Status
Begin by checking your current driver status. This helps identify issues. Navigate to the Device Manager. Look for ‘Sound, video and game controllers’. Check for any warning symbols. These symbols indicate driver issues. If present, updating is necessary.
Download Updated Drivers
Visit your computer manufacturer’s website. Find the support or downloads section. Look for audio or sound drivers. Download the latest version. Save the file to your computer. Ensure you download the correct drivers. Compatibility with your system is essential.
Install New Drivers
After downloading, locate the file. Double-click to begin installation. Follow the on-screen instructions. Restart your computer after installation. This ensures changes take effect. Check if the audio issue is resolved. If not, further troubleshooting may be needed.
Use Windows Update
Windows Update can also help. Access ‘Settings’ from the start menu. Click ‘Update & Security’. Select ‘Windows Update’. Click ‘Check for updates’. Windows may find new driver updates. Install any available updates. This can fix audio driver issues.
Consider Third-party Tools
Third-party tools can simplify driver updates. Tools like Driver Booster are popular. They automatically scan for outdated drivers. They download and install updates. These tools save time. They ensure your drivers are up-to-date.
Updating sound drivers is crucial for resolving audio issues. It keeps your system running smoothly. Regular updates prevent future problems. Stay proactive with driver maintenance.
Enable Audio Device
Experiencing issues with the audio on your Windows 10 can be frustrating. Sometimes, the problem lies in the audio device not being enabled. Understanding how to enable the audio device can solve the issue quickly. This section guides you through the steps to activate the audio device, ensuring sound returns to your computer.
Access The Device Manager
Start by opening the Device Manager. Press the Windows key and the X key at the same time. Select ‘Device Manager’ from the menu that appears. This tool displays all hardware installed on your computer.
Locate Sound, Video, And Game Controllers
In Device Manager, find the section labeled ‘Sound, video, and game controllers.’ Click the arrow next to it to expand the list. Here, you’ll see your audio devices listed.
Check Disabled Devices
Right-click the audio device you want to enable. If the option ‘Enable device’ appears, select it. This action activates the audio device. If the option doesn’t appear, the device might already be enabled.
Update Audio Drivers
If enabling the device doesn’t work, try updating the drivers. Right-click the audio device again. Choose ‘Update driver’ from the menu. Follow the on-screen instructions to complete the update.
Restart Your Computer
After updating, restart your computer to apply changes. This step ensures that the device and drivers function correctly. Check if the audio is working after the restart.
Run Audio Troubleshooter
Experiencing audio issues in Windows 10 can be frustrating. One effective way to tackle this is by using the built-in audio troubleshooter. It’s a tool designed to identify and solve common sound problems. Running it could be the solution you need to regain sound.
How To Access The Audio Troubleshooter
Start by clicking the Start menu. Choose ‘Settings’ from the options. In the settings window, find ‘Update & Security’. Click it to proceed. Next, select ‘Troubleshoot’ from the left sidebar. You’ll see a list of troubleshooters. Scroll to find ‘Playing Audio’. Click it, then select ‘Run the troubleshooter’.
What The Troubleshooter Does
The troubleshooter scans your system for issues. It checks drivers and audio settings. If it detects a problem, it provides solutions. You might be asked to update drivers or change settings. Follow the suggestions given. These steps often resolve audio problems.
Why Use The Audio Troubleshooter?
This tool saves time. It automates the process of finding solutions. It’s user-friendly and requires no technical skills. Anyone can use it with ease. It often resolves issues quickly. It’s a reliable first step for fixing audio problems.
Additional Tips After Using The Troubleshooter
If audio issues persist, consider updating your audio drivers manually. Visit the manufacturer’s website for the latest updates. Also, ensure all cables and connections are secure. Sometimes hardware issues can cause sound problems. Checking these can help resolve lingering issues.
Configure Playback Settings
Encountering the “No Audio Output Device is Installed” error on Windows 10 can be frustrating. Configuring playback settings can often resolve this issue. Ensuring your audio settings are correctly set up is crucial for smooth sound output. Adjusting these settings can help your computer recognize audio devices.
Check Default Playback Device
Right-click the sound icon in the taskbar. Select “Sounds” from the context menu. This opens the Sound settings window. Click on the “Playback” tab. Here, ensure the correct device is set as default. If not, select the desired device and click “Set Default.”
Update Audio Drivers
Outdated drivers often cause audio issues. Right-click the Start button and choose “Device Manager.” Expand “Sound, video and game controllers.” Right-click your audio device and select “Update driver.” Follow the prompts to update the driver.
Enable Audio Devices
Sometimes, devices are disabled accidentally. In the “Playback” tab, right-click an empty area. Choose “Show Disabled Devices.” If your audio device appears, right-click it. Select “Enable” to activate the device.
Test Sound Output
After changes, test the sound. Play audio to check if it works. Ensure volume is not muted. Also, verify the speakers or headphones are connected properly.
Restart Windows Audio Services
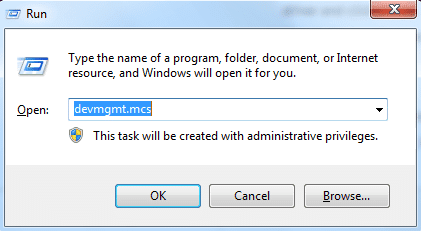
Restarting audio services can fix sound issues. Press “Windows + R” to open the Run dialog. Type “services.msc” and press Enter. Find “Windows Audio” in the list. Right-click it and select “Restart.”
Credit: www.driversupport.com
Check Windows Services
Encountering ‘No Audio Output Device is Installed’ on Windows 10? Investigate Windows Services for potential fixes. Ensuring relevant services are active might resolve audio issues swiftly.
In today’s digital age, encountering the “No Audio Output Device is Installed” error on your Windows 10 device can be frustrating. It might seem like your computer is determined to stay silent. But don’t worry, one effective way to tackle this issue is by checking Windows Services. This might sound technical, but it’s simpler than it appears.Understanding Windows Services
Windows Services are background processes that help your computer run smoothly. They ensure that various functions, like audio, are working properly. Without these services, your computer might not perform as expected. So, if your audio isn’t working, checking these services is a logical step.Accessing Windows Services
To get started, you need to access the Windows Services. Simply press the Windows key + R to open the Run dialog box. Type services.msc and hit Enter. This will open the Services window.Locating The Audio Services
In the Services window, you’ll find a list of all services running on your computer. Scroll down to find the Windows Audio service. This service is crucial for sound to work on your device.Checking The Status Of Audio Services
Once you locate the Windows Audio service, check its status. If it’s not running, that might be why your audio isn’t working. You can start the service by right-clicking and selecting Start.Setting Audio Services To Automatic
To ensure your audio service runs every time you start your computer, set it to Automatic. Right-click the Windows Audio service, select Properties, then set the Startup type to Automatic. This simple step can save you future headaches.Restarting Your Computer
After making changes, it’s a good idea to restart your computer. This ensures that all changes take effect. You might find that your audio issue is resolved after a simple reboot.Reflecting On The Solution
Have you ever ignored a small task, thinking it was too complicated, only to realize it was quite simple? Checking Windows Services is one of those tasks. It might seem daunting, but it can be a straightforward fix to your audio woes. Why let a small oversight ruin your audio experience when a few clicks could restore it? Taking these steps not only solves the problem but also empowers you with the knowledge to tackle similar issues in the future.Restore System Settings
Experiencing audio issues on Windows 10? Restoring system settings might help resolve the ‘No Audio Output Device is Installed’ error. This method can fix configuration conflicts, helping your computer recognize audio devices again. Ensure your sound returns without technical hassles.
Restoring your system settings can be a lifesaver when dealing with the dreaded “No Audio Output Device is Installed” error on Windows 10. Imagine sitting down to watch your favorite movie, only to realize there’s no sound. Frustrating, right? Restoring your system settings can often resolve this issue by returning your computer to a state when everything was working perfectly. Let’s dive into how you can do this effectively.Understanding System Restore
System Restore is like a rewind button for your computer. It allows you to revert your PC back to a previous state, undoing recent changes that might have caused the audio issue. Think of it as a time machine for your software. You don’t need to worry about losing your files. System Restore focuses on system changes and won’t affect your personal documents.Steps To Restore System Settings
Here’s a straightforward guide to help you restore your settings: 1. Access System Restore: Type “Create a restore point” in the search bar and select it from the results. This opens the System Properties window. 2. Choose System Restore: Click on the “System Restore” button. Follow the prompts to select a restore point. Pick a date before the audio issue started. 3. Confirm Your Action: Review the details and confirm your choice. Your computer will restart and begin the restoration process. It’s as simple as that. You’ll be guided step-by-step, making it easy even if you’re not a tech expert.Precautions Before Restoring
Before you proceed, ensure you have saved any important work. While System Restore won’t delete personal files, it’s always good to be cautious. Consider creating a backup of your system settings. This serves as an extra layer of security, providing peace of mind.Personal Experience With System Restore
I once faced a similar issue during a crucial presentation. The audio vanished just as I was about to begin. Using System Restore saved the day, bringing back the sound and my confidence. Have you ever been stuck in a similar scenario? It’s amazing how a simple restoration can fix things.What If System Restore Doesn’t Work?
Sometimes, System Restore might not resolve the issue. Don’t panic! There are other methods to explore, such as updating audio drivers or checking hardware connections. Keep experimenting until you find the solution that works for you. Remember, every problem has multiple solutions.Final Thoughts On System Restoration
Can restoring system settings be your go-to solution for audio issues? Absolutely. It’s quick, effective, and requires minimal effort. Have you tried it before, or do you have other tips? Feel free to share your experiences. Your insights could help someone else in their time of need.
Credit: answers.microsoft.com
Inspect Hardware Issues
Experiencing “No Audio Output Device is Installed” on Windows 10 can be frustrating. One common cause is hardware issues. Addressing hardware problems can restore your audio quickly. Start by examining the physical components. Often, a simple check can solve the problem.
Check Audio Cables
Ensure all audio cables are securely connected. Loose cables can interrupt sound. Verify connections to the computer and speakers. Use the correct ports for each cable. Sometimes, cables wear out. Consider testing with a different cable.
Inspect Audio Jack
Look closely at the audio jack. Dust or debris can block connections. Clean the jack with a soft, dry cloth. Avoid using sharp objects. A damaged jack may need replacement. Try connecting to another audio port if available.
Review Sound Card
Check if the sound card is firmly seated in its slot. An improperly installed card can cause audio issues. Remove and reinsert the sound card carefully. Consult your computer manual for guidance. Ensure the card is compatible with your system.
Test With External Speakers
Connect external speakers or headphones. This can determine if the issue is internal. If external devices work, internal speakers may be faulty. Test both wired and wireless options. This helps isolate the problem.
Examine Usb Audio Devices
Sometimes, USB audio devices interfere with sound settings. Disconnect any USB audio devices temporarily. Check if the audio returns. Reconnect them one by one. This helps identify faulty devices.
Frequently Asked Questions
Why Is My Audio Device Not Detected?
Your audio device may not be detected due to outdated or missing drivers. Hardware conflicts can also cause this issue. Check your device manager for any errors. Update drivers through Windows Update or manufacturer’s website. Restart your system to see if the problem resolves.
How To Fix No Audio Device Error?
To fix the no audio device error, first check your device manager. Update or reinstall audio drivers if needed. Ensure your audio device is properly connected. Run Windows Troubleshooter to identify any issues. Restart your computer after making changes to apply fixes.
Can Windows Update Solve Audio Issues?
Yes, Windows Update can solve audio issues by providing the latest drivers. Check for updates in Settings under Update & Security. Install any available updates to ensure optimal hardware compatibility. Regular updates can prevent many common audio problems.
Is Hardware Conflict Causing No Audio Device Error?
Hardware conflicts can cause the no audio device error. Check for conflicting devices in the device manager. Disable any unnecessary devices. Properly configure your audio settings. Resolving these conflicts can help restore audio functionality.
Conclusion
Solving audio issues on Windows 10 can be straightforward. Start by checking your sound settings. Ensure the audio drivers are updated. Restarting your computer often helps. Try plugging in your headphones or speakers. If problems persist, consider seeking professional support.
Regular maintenance can prevent future audio errors. Keeping your system updated is crucial. Follow these steps for a smoother experience. Enjoy uninterrupted sound on your device. Always stay informed about system updates. Your audio solutions are closer than you think.