
Have you ever struggled to find the perfect angle to capture a photo or video with your smartphone? Or maybe you’ve tried watching a video hands-free, only to have your phone slip and slide away?
You’re not alone. This common frustration has a simple solution: a DIY smartphone mount. Imagine transforming everyday items into a practical tool that keeps your phone steady and your hands free. This article will show you how to create your own smartphone mount, using materials you already have at home.
You’ll discover how easy it is to enhance your smartphone experience without breaking the bank. So, if you’re ready to unleash your creativity and solve your smartphone woes, keep reading! You’ll soon see just how empowering and rewarding it can be to make your own mount.
Benefits Of A Smartphone Mount
In today’s fast-paced world, having your smartphone ready and accessible is essential. A smartphone mount can be your handy companion, ensuring your device is always at your fingertips. Whether you’re driving, cooking, or working out, this small tool offers big benefits.
1. Enhanced Safety While Driving
Distracted driving is a major concern, and a smartphone mount can help you stay focused on the road. By securing your phone, you can easily follow GPS directions without fumbling around. This simple addition to your car can make your journeys safer.
2. Improved Productivity
Need to follow a recipe or a workout video? A smartphone mount keeps your phone in clear view, freeing up your hands for other tasks. You’ll find that you can multitask more efficiently with your phone securely positioned.
3. Versatile Usage
Have you ever tried to prop up your phone against a random object, only to have it slip and fall? A mount eliminates this hassle, providing a stable platform. You can use it anywhere – in the car, on your desk, or even on your bike.
4. Easy Accessibility
With a smartphone mount, you never have to worry about where to put your phone. It keeps your device within easy reach, making it simple to take calls or change music tracks. This accessibility means you can stay connected without missing a beat.
5. Cost-effective Solution
Building your own DIY smartphone mount is a budget-friendly project. With materials you likely already have, you can create a functional and personalized tool. It’s a small investment with big returns in convenience and safety.
Have you ever considered the convenience a smartphone mount could bring to your daily routine? It might just be the upgrade you didn’t know you needed.
Essential Materials
Crafting a DIY smartphone mount requires basic materials like cardboard, rubber bands, and glue. These items offer flexibility for custom designs. Simple tools such as scissors and a ruler help achieve precision.
Creating a DIY smartphone mount can be a fun and rewarding project. It’s a chance to customize your setup and save money while doing so. Knowing the essential materials beforehand makes the process smoother and ensures your mount is sturdy and reliable.Gathering Cardboard
Cardboard is an excellent material for your DIY smartphone mount. It’s sturdy enough to hold your phone and easy to cut into the desired shape. Look for cardboard from old boxes or packaging; recycling is always a smart choice. You might even find a piece with a pattern or color you like.Choosing Adhesives
Adhesives play a crucial role in ensuring your mount stays intact. Options like hot glue or double-sided tape work well. They provide a strong bond and are easy to use. Just think about how often you’ll be adjusting your phone—these adhesives should withstand frequent changes.Finding Rubber Bands
Rubber bands are surprisingly useful in DIY projects. They can secure your phone onto the mount without leaving any marks. Choose bands that are thick and durable. They should stretch comfortably around your phone without snapping.Utilizing Scissors Or A Craft Knife
A reliable pair of scissors or a craft knife is essential for cutting cardboard accurately. Make sure they are sharp to avoid frayed edges. Safety is key—always cut away from yourself and keep your fingers clear of the blade.Considering Decorative Elements
Adding decorative elements can personalize your mount. Consider stickers, paint, or fabric to give it a unique touch. This is where your creativity shines; make it reflect your style. Wouldn’t it be great to have a mount that not only works well but looks good too?Testing Stability With Weight
Finally, ensure your mount is stable. Test it with different weights to mimic your phone’s load. This step is crucial; you don’t want your phone falling off unexpectedly. A stable mount is a trustworthy mount. Are you excited to start crafting your DIY smartphone mount? Gather these materials, and you’re on your way to a practical and personalized solution.Choosing The Right Design
Finding the perfect design for a DIY smartphone mount involves considering stability and ease of use. Simple materials like cardboard or plastic can be shaped to securely hold your device. Personalize your mount by adding features like rotation or adjustable angles for better viewing.
Choosing the right design for your DIY smartphone mount can make a world of difference in its functionality and ease of use. You want something that fits seamlessly into your daily routine, whether you’re using it for navigation, video calls, or capturing moments on the go. Consider the balance between stability and versatility—these aspects are crucial in deciding whether to go for an adjustable or fixed design, and whether to orient your phone vertically or horizontally. How do you choose the perfect design that meets your specific needs? Let’s dive into these considerations.Adjustable Vs. Fixed
An adjustable mount offers flexibility. You can effortlessly change angles and positions, making it ideal for those who use their phones for various purposes throughout the day. Imagine switching from a hands-free call to filming a quick video without needing to adjust your entire setup. On the other hand, a fixed mount provides stability. If your primary use is navigation while driving, a fixed position might be safer and more reliable. Have you ever tried to adjust your phone while driving, only to have it slip? A fixed mount could prevent such mishaps, keeping your focus on the road.Vertical Vs. Horizontal
The orientation of your smartphone can greatly affect your experience. A vertical mount is perfect for tasks like scrolling through social media or reading long articles. It aligns naturally with the way most apps are designed, offering a familiar feel. Conversely, a horizontal mount enhances your video viewing experience. Watching a movie or playing a game becomes immersive when your screen is in landscape mode. Think about your favorite movie scenes—aren’t they more engaging when viewed horizontally? In deciding between these designs, consider your primary use. Do you often find yourself flipping your phone around to get the perfect view? Reflect on how you typically use your device and choose a design that complements your habits. Your DIY project should simplify your life, not complicate it.Step-by-step Assembly
Create a smartphone mount with simple steps. Gather materials like clips and adhesive. Follow the guide to assemble a sturdy holder. Perfect for hands-free use.
If you’ve ever struggled to get the perfect angle on a video call or capture that ideal selfie, you know the value of a sturdy smartphone mount. Why not create your own? A DIY smartphone mount not only saves money but adds a personal touch to your tech accessories. Let’s walk through the step-by-step assembly process, ensuring your mount is both functional and stylish.Preparing The Materials
Before you dive into the assembly, gather all necessary materials. You’ll need a strong base like a small piece of wood or thick cardboard. Ensure you have a sturdy clip or clamp to hold your smartphone in place. Grab some adhesive like super glue or double-sided tape. These will secure the parts together. A few rubber bands might also come in handy for added grip.Constructing The Base
Start by cutting the base to the desired size. It should be large enough to support your phone but not too bulky. My first attempt was too small, and the phone kept tipping over—a lesson learned! Sand the edges if using wood, to avoid any splinters. This will make your DIY project look polished and professional.Securing The Mount
Attach the clip or clamp securely to the base using the adhesive. Ensure it can grip your phone tightly without scratching it. You might use a layer of fabric or foam for protection. Test the mount with your phone. Adjust if necessary to ensure stability. Does it hold your phone at the right angle? If not, tweak the position or add support until it feels just right. Have you ever thought about how customizable a DIY mount can be? Add some paint or stickers to personalize yours. This project not only showcases your creativity but provides a practical solution to everyday problems.Customizing Your Mount
Customizing your DIY smartphone mount can make it unique. Personal touches add flair and functionality. This section explores different ways to enhance your mount. Let’s dive into creative ideas that transform a basic holder into a stylish accessory.
Adding Decorative Elements
Decorative elements give your mount personality. Choose colors that match your room. Paint or tape can add vibrant hues. Stickers offer an easy way to personalize. They come in various designs and themes. Add a little sparkle with rhinestones or glitter. Ensure decorations do not interfere with the mount’s function.
Incorporating Functionality
Boost your mount’s functionality with useful features. Add a small clip for cables. This keeps wires organized. Attach a pocket for earphones or pens. Magnets can hold small metal items securely. Consider adding a swivel feature. It allows easy adjustments for better viewing angles. Ensure any additions do not compromise stability.
Tips For Optimal Use
Maximize your DIY smartphone mount’s potential by ensuring stability with sturdy materials. Adjust angles for perfect viewing and easy access. Secure your device gently to avoid scratches or damage.
Creating a DIY smartphone mount is a fun and cost-effective project. However, making the most out of it requires a few tips for optimal use. By focusing on the right positioning and maintaining stability, you can enhance your viewing experience. Let’s dive into these crucial aspects to ensure your DIY mount serves you well.Positioning For Best View
The position of your smartphone mount can make or break your experience. Start by identifying the primary purpose: watching videos, video calls, or navigation. For video watching, placing the mount at eye level can reduce neck strain. Think about lighting. Position the mount where there’s ample light, but avoid glare directly on the screen. This ensures a clear view without straining your eyes. Experiment with angles. A slight tilt can sometimes offer a better perspective, especially during video calls. Adjust until you find the sweet spot that feels natural and comfortable.Maintaining Stability
A stable mount is essential for an uninterrupted experience. If your DIY mount is wobbly, it might not serve its purpose effectively. Ensure that the base is secure and won’t tip over easily. Consider using materials like rubber bands or foam pads to grip the phone better. This can prevent slipping and potential damage to your device. Think about where you place the mount. A flat, even surface can significantly boost stability. On uneven surfaces, your phone might keep tilting, frustrating you over time. Have you ever found your phone slipping mid-video call because the mount wasn’t stable? It’s annoying, right? Addressing stability will save you from these distractions and enhance your smartphone experience. What are your favorite tips or hacks for using a smartphone mount? Share your thoughts and help others in the comments below!Troubleshooting Common Issues
Building your own smartphone mount can be a rewarding project. But, like any DIY task, it may come with some challenges. Understanding common issues and how to troubleshoot them ensures your mount works perfectly. Let’s explore solutions to the most frequent problems.
Fixing Loose Joints
Loose joints can make your mount unstable. Begin by checking all screws and bolts. Tighten them with a screwdriver or wrench. If threads are worn out, replace the screw with a slightly larger one. This ensures a tighter fit. Consider using a thread-locking adhesive for extra security.
Ensuring Compatibility
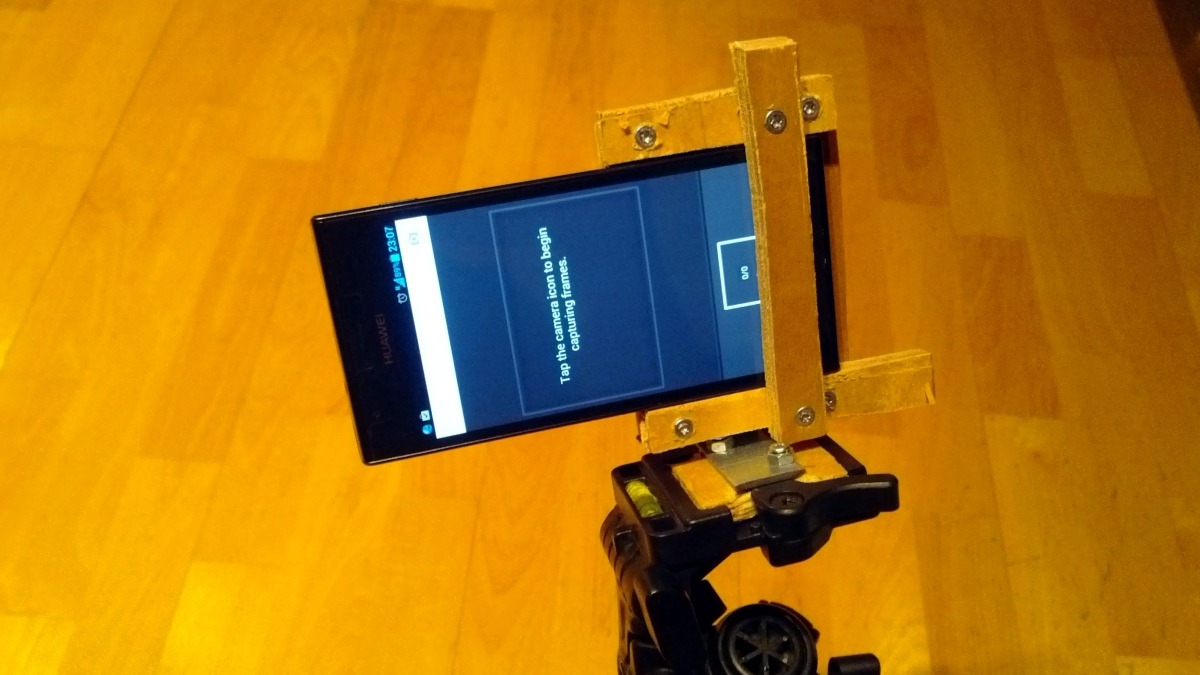
Not all mounts fit every smartphone. Measure your phone’s width and thickness. Compare these with the mount’s specifications. If the fit is too tight, sand down the grip slightly. If too loose, add foam padding to secure the device. Test the mount with different phone models if possible.
Credit: diyprojects.eu
Safety Considerations
Building a DIY smartphone mount requires attention to safety. Ensure the materials used are sturdy and secure. Double-check that the phone is held firmly in place to prevent accidental falls or damage.
Creating a DIY smartphone mount can be both fun and practical. However, ensuring the mount is safe to use is crucial. You don’t want your smartphone flying off while you’re driving or taking a bike ride. Safety considerations should be at the forefront of your project to protect both your device and yourself.Choose Durable Materials
When selecting materials for your smartphone mount, durability is key. Opt for materials like sturdy plastic or metal that can withstand pressure and movement. If you’re considering using household items, ensure they are robust enough to support your smartphone’s weight. Have you ever had a DIY project break just when you needed it most? Avoid that frustration by picking strong materials.Secure Attachment
Your mount should attach securely to whatever surface you’re mounting it on. Whether it’s your car dashboard or bike handlebars, use strong adhesives or clamps. Double-check its stability before hitting the road. Remember the time when a loose mount led to a cracked screen? Let’s make sure that doesn’t happen again. Test the attachment under different conditions like bumpy roads or windy rides.Consider Device Accessibility
A safe mount allows easy access to your device’s functions without compromising safety. Ensure buttons and screens are reachable without removing your smartphone from the mount. Will you be able to adjust the volume or answer calls easily? Plan your mount design to offer accessibility without distraction.Visibility And Positioning
Position your smartphone mount to offer clear visibility without obstructing your view. Whether you’re driving or cycling, your focus should remain on the road. A mount positioned too high or too low can be dangerous. Reflect on a time when an ill-placed device affected your concentration. Adjust the mount to ensure it doesn’t become a hazard.Regular Maintenance
Regularly check the mount for wear and tear. Over time, materials can degrade, impacting safety. Schedule routine inspections to ensure everything is in working order. Have you ever ignored a small crack until it became a big problem? Catch issues early to avoid unexpected mishaps.Test Before Use
Before fully relying on your DIY mount, test it in a controlled environment. Try it out in your driveway or a parking lot to see how it holds up. Have you ever trusted a DIY project only to find it wasn’t quite right? Testing ensures your mount is ready for real-world use, offering peace of mind. Creating a DIY smartphone mount is rewarding, but safety must never be an afterthought. Each step you take toward ensuring its durability and secure attachment is a step toward protecting your device and yourself. Are you ready to build a mount that’s both practical and safe?Enhancing The Viewing Experience
Create your own smartphone mount for a better viewing experience. Transform any surface into a perfect spot for your phone. Enjoy hands-free viewing with this simple and cost-effective DIY project.
Enhancing the viewing experience on your smartphone can transform how you interact with your favorite content. Whether you’re watching movies, joining a virtual meeting, or following a recipe, a DIY smartphone mount can be a game-changer. By making simple tweaks, you can maximize comfort and enjoyment.Pairing With Accessories
Accessories can elevate your smartphone viewing. Consider a Bluetooth speaker for better sound quality during movie nights. A pair of wireless headphones might be ideal for a more personal experience, especially if you share your living space. Think about adding a portable charger to ensure your device doesn’t run out of battery during a binge-watch session. A small ring light can enhance video calls, making you look great even in dim lighting. What accessories do you think would enhance your setup?Optimizing Screen Settings
Adjusting your smartphone’s screen settings can dramatically improve your viewing experience. Start by increasing the brightness for outdoor use or reducing it in a dark room to avoid eye strain. Enable the blue light filter to protect your eyes during long viewing sessions, especially at night. Adjust the screen resolution if your device allows; higher resolution gives a crisper image, perfect for watching high-definition content. Have you explored the settings menu of your smartphone lately? Enhancing your viewing experience with a DIY smartphone mount doesn’t stop at positioning. By combining accessories and optimizing settings, you can create a mini home-theater experience right in your hands. Give it a try and see the difference it makes in your daily routine!
Credit: makezine.com

Credit: www.youtube.com
Frequently Asked Questions
How To Make A Diy Smartphone Mount?
Creating a DIY smartphone mount is easy. Use household items like cardboard, rubber bands, or old phone cases. Ensure stability by securing your phone snugly. Follow online tutorials for step-by-step instructions. This project is cost-effective and customizable to your needs.
What Materials Do I Need For A Smartphone Mount?
You need basic materials like cardboard, rubber bands, or clips. For added stability, consider using a strong adhesive or glue. Optional items like paint or fabric can enhance the aesthetic. Gather these items before starting your DIY project for a smoother experience.
Can I Use A Diy Mount In My Car?
Yes, DIY mounts can be used in cars. Ensure the mount is stable and securely attached. It’s important to test its durability before use. Customize the design to fit your car’s interior. This offers a cost-effective alternative to purchasing expensive car mounts.
Is A Diy Smartphone Mount Reliable?
A DIY smartphone mount can be reliable if well-made. Ensure stability and durability by using quality materials. Regularly check for wear and tear. Customize the design to suit your needs. This approach provides a practical and budget-friendly solution.
Conclusion
Creating a DIY smartphone mount is a fun, simple project. You save money and learn new skills. With basic materials, you can craft a custom holder. Enjoy hands-free convenience while driving or at home. It’s perfect for video calls and watching shows.
Plus, it keeps your phone safe and steady. Try it today and experience the difference. Share your creation with friends and family. They might want one too. Remember, creativity and patience lead to great results. Happy crafting!



