
Imagine turning your living room into a cozy home theater without spending a fortune. Sounds exciting, right?
With a DIY smartphone projector, this dream is entirely within your reach. Whether you’re planning a movie night with friends, a romantic date at home, or just want to impress your family with a fun project, crafting your own projector is the way to go.
It’s a simple, creative, and cost-effective solution that taps into your love for gadgets and your knack for innovation. You’re not just building a projector; you’re creating experiences, memories, and more intimate moments with your loved ones. Keep reading, and you’ll discover how easy it is to transform your smartphone into a powerful entertainment tool. Let’s dive into the step-by-step guide and get your DIY skills rolling!

Credit: www.instructables.com
Materials Needed
Creating a DIY smartphone projector is a fun project. You’ll need some basic materials to get started. These materials are affordable and easy to find. Preparing the right tools and supplies ensures a smooth process.
Essential Tools
Scissors are a must for cutting. A sharp knife helps for precise cuts. Tape secures parts together effectively. A ruler ensures accurate measurements. A pencil is handy for marking spots.
Recommended Supplies
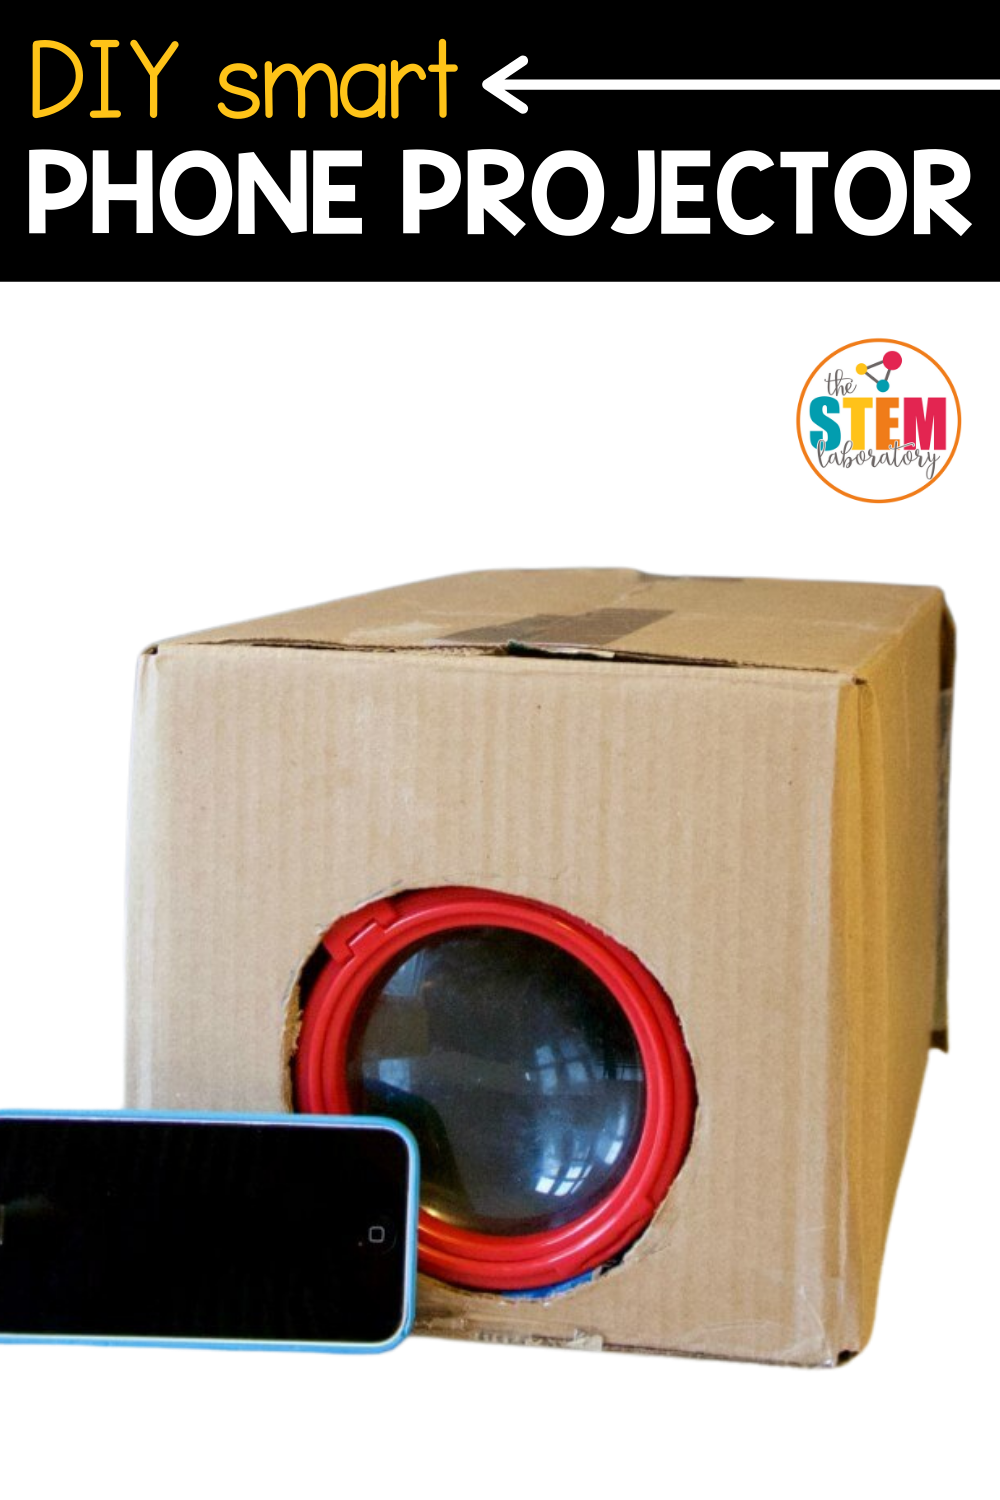
A shoebox acts as the projector’s body. A magnifying glass is key for enlarging the image. A smartphone serves as the projector’s source. Black construction paper prevents light leakage. Glue secures the paper in place.
Step-by-step Instructions
Creating your own smartphone projector is a fun and rewarding activity. With some simple steps, you can turn a few materials into a useful device. Follow these instructions to build a projector that will surprise your friends.
Building The Projector Box
Start by collecting a shoebox or any similar-sized box. A box with a lid works best. Ensure the box is sturdy and clean. Trace a circle on one end of the box where the lens will go. Use a pencil for better precision. Carefully cut out the circle using a craft knife. Make sure the circle fits the lens snugly.
Installing The Lens
Choose a magnifying glass for your lens. The glass should fit the circle perfectly. Secure the lens in place with strong tape or glue. Double-check that it’s centered and stable. This ensures your image will be clear and focused. Avoid any gaps around the lens.
Creating A Stand
Your smartphone needs a stand within the box. Use a cardboard piece to create a simple platform. Cut and fold the cardboard to fit inside the box. Ensure it’s elevated enough to align with the lens. Secure the stand with tape or glue. Test the stability by placing your phone on the stand. Adjust if necessary.
Optimizing Image Quality
Creating a DIY smartphone projector is a fun and rewarding project. However, getting the best image quality can be a bit tricky. It’s crucial to fine-tune the setup to enjoy a cinema-like experience at home. With just a few adjustments, you can significantly enhance your viewing experience. Let’s dive into some practical tips on optimizing image quality for your DIY projector.
Adjusting Focus
Getting the focus right is essential for a clear picture. Start by placing your smartphone at the right distance from the lens. You might need to experiment a bit, moving the phone closer or further to find the sweet spot.
If you’re using a magnifying glass as your lens, you can adjust its position slightly to sharpen the image. Consider marking the ideal spot for easy adjustments in the future.
Don’t hesitate to tweak the projector’s settings too. Use your phone’s focus options if available. Sometimes, simply tapping on the screen can make a big difference.
Enhancing Brightness
Brightness plays a key role in image clarity. Your phone’s brightness setting can often be cranked up to improve the projection.
A dark room can enhance brightness naturally. Consider using blackout curtains to minimize ambient light.
Think about how your screen saver settings might affect brightness. Turn off auto-dimming features to maintain a consistent brightness level.
Maximizing Screen Size
Increasing the screen size can make your viewing experience more immersive. Move your projector further away from the wall or screen to enlarge the image.
Keep in mind that increasing size may affect clarity. Make sure to balance size with resolution for the best results.
Have you tried experimenting with different projection surfaces? A smooth, white wall can significantly boost image size and quality.
Optimizing your DIY smartphone projector is all about the small tweaks. What strategies will you use to enhance your viewing experience? Your adjustments can turn a simple setup into a personal cinema.
Credit: thestemlaboratory.com
Troubleshooting Common Issues
Building a DIY smartphone projector can be a fun project. But sometimes, you may face issues. These common problems can affect your viewing experience. Don’t worry. Most issues have simple solutions. Let’s explore how to fix them.
Blurry Images
Blurry images often result from poor focus. Adjust the lens until the picture is clear. Ensure your phone screen is clean. Dust or smudges can blur images. Check the distance between the projector and the wall. It should be neither too close nor too far. Use a dark room for better image clarity.
Distorted Sound
Distorted sound can ruin the experience. First, check your phone’s volume. It should be high enough. Use external speakers for better sound quality. Ensure they are correctly connected. Avoid placing your phone in a way that blocks the speakers. This can distort sound.
Weak Projection
Weak projection is a common issue. It often occurs in bright rooms. Try using the projector in a darker setting. Adjust the brightness settings on your phone. Make sure the lens is clean and free of dust. A clean lens allows stronger light projection. Check the projector’s box. It should be properly aligned and secure.
Creative Customizations
Building a DIY smartphone projector is just the beginning. You can add a personal touch to your creation. Customizations make it unique and fun. They enhance both function and style.
Let your imagination guide you. Whether through design, components, or sound, the possibilities are vast.
Decorative Designs
Make your projector stand out. Use paints or stickers for decoration. Choose colors that match your room. Patterns like stripes or polka dots add flair.
You can also use washi tape. It’s colorful and easy to remove. Change designs whenever you like.
Upgrading Components
Consider upgrading parts for better performance. A stronger lens gives a clearer picture. Try using a magnifying glass lens.
You can also improve the box. Use thicker cardboard for durability. A sturdy box lasts longer and protects better.
Adding Audio Enhancements
Sound quality is important for a great experience. Attach small speakers for clearer audio. Bluetooth speakers can connect easily to your phone.
Place speakers near the projector. This way, sound and picture are in sync. You enjoy a complete home theater feel.
Safety Tips
Building a DIY smartphone projector requires careful attention to safety. Use scissors and sharp tools with caution. Ensure the projector box is stable to avoid accidents.
Creating a DIY smartphone projector can be a fun and rewarding project. However, it’s essential to keep safety in mind while building it. You don’t want your enthusiasm to be dimmed by an unexpected mishap. This section will guide you through some safety tips to ensure your project stays as enjoyable and accident-free as possible.Handling Tools Safely
When working with tools, even simple ones, it’s crucial to handle them with care. Always read the instructions for any tool you use, whether it’s a box cutter or a screwdriver. Make sure your work area is well-lit and organized. This helps prevent accidents caused by misplaced tools or tripping over cables. Wear protective gear like gloves when necessary. It might seem excessive, but it can protect your hands from cuts and scrapes. Have you ever cut yourself because you were in a rush? Taking it slow can prevent such accidents.Protecting Your Smartphone
Your smartphone is at the heart of this project, so protecting it should be a priority. Ensure that your phone is secured properly in the projector setup to prevent it from falling and getting damaged. Avoid using excessive tape or adhesives directly on your phone. They can leave residue or damage the screen. Instead, consider using a case to provide an extra layer of protection. Be mindful of overheating. Running your phone at high brightness for an extended period can cause it to heat up. Make sure your projector setup allows for adequate airflow. Have you ever noticed your phone getting hot during long video calls? The same can happen here, so give it some breathing room. Remember, safety doesn’t take the fun out of DIY projects. It ensures that you can enjoy your homemade projector without any unnecessary setbacks. What safety measures do you prioritize in your DIY projects?Benefits Of Diy Projectors
DIY projectors offer unique benefits for tech enthusiasts. They provide a creative and functional way to watch videos. Building your own projector is not only fun but also rewarding.
Cost-effective Entertainment
DIY projectors save money. Traditional projectors can be expensive. A homemade projector uses simple materials. Most people find these materials at home. You might need a magnifying glass and cardboard. These are cheap and easy to get. This makes DIY projectors a budget-friendly choice.
Personalized Viewing Experience
DIY projectors offer a personal touch. You can adjust the size and shape. Tailor the design to your taste. This allows you to create a unique viewing setup. Some prefer a small, portable device. Others might want a larger setup for group viewing. Customize it to meet your needs.
Educational Applications
DIY projectors are great for learning. They help explain concepts visually. Show educational videos or presentations. Teachers can use them in classrooms. Students can create them for school projects. This hands-on activity promotes learning and creativity.

Credit: www.youtube.com
Frequently Asked Questions
How To Make A Smartphone Projector?
Creating a smartphone projector is simple and fun. You’ll need a magnifying glass, a cardboard box, and some tape. Cut a hole for the magnifying glass, position your phone inside, and adjust the focus. This DIY project offers an inexpensive way to enjoy videos on a larger screen.
What Materials Are Needed For A Diy Projector?
For a DIY smartphone projector, gather a magnifying glass, cardboard box, tape, and a smartphone. These materials are easily accessible and affordable. They allow you to transform your smartphone into a projector, perfect for small home screenings without any expensive equipment.
Can A Diy Projector Damage My Phone?
A DIY projector is generally safe for smartphones. However, ensure that your phone doesn’t overheat during use. Keep it well-ventilated and monitor its temperature. Proper care and usage minimize any potential risks, making this project safe for your device.
How To Improve Diy Projector Image Quality?
Improving image quality requires careful adjustments. Ensure your phone’s brightness is at maximum. Darken the room for better contrast. Adjust the focus by moving the phone closer or further from the lens. These tweaks help achieve clearer, sharper projections.
Conclusion
Creating a DIY smartphone projector offers a fun, hands-on experience. It’s simple, affordable, and provides great entertainment at home. This project allows you to watch videos on a larger screen without buying expensive equipment. With a few household items, you can enhance your movie nights.
Friends and family will surely enjoy this creative setup. Experiment with different designs to improve projection quality. Share your DIY projector journey with others who love crafting. Whether for movies or presentations, this gadget can be quite useful. Dive into this project today and bring cinema magic to your living room!



