
Are you struggling to connect your printer to your desktop computer? You’re not alone.
Many people find themselves tangled in cords and lost in confusing instructions. But don’t worry, this guide is here to help you make that connection swiftly and effortlessly. Imagine the ease of printing documents with just a few clicks, without the hassle of dealing with technical jargon.
You’ll learn simple steps to get your printer up and running in no time. Dive into this article and discover how easy it can be to transform your home or office setup into a seamless printing experience. Your frustration ends here, and your productivity is about to soar!
Choose The Right Printer
Connecting a printer to a desktop computer involves selecting the right cable or wireless option. Ensure both devices are powered on, then follow the setup instructions specific to your printer model. Once connected, test a print to confirm successful communication between the devices.
Choosing the right printer for your desktop computer is a crucial step that can save you time, money, and frustration down the line. It’s not just about picking a printer that fits your budget; it’s about finding one that meets your needs and seamlessly integrates with your setup. Whether you’re a student, a professional, or someone who loves to print photos, there’s a perfect printer out there for you.Check Compatibility
Before you purchase a printer, ensure it’s compatible with your desktop computer. This might sound obvious, but it’s a step that’s often overlooked. A friend of mine once bought a high-end printer only to discover it wasn’t compatible with his computer’s operating system. Check the printer’s specifications online or on the box. Make sure it supports your operating system, be it Windows, macOS, or Linux. Compatibility ensures that you can fully utilize the printer’s features without running into software issues.Decide On Wired Or Wireless
Do you prefer a clean desk with minimal cables, or do you prioritize stable connections? This choice will help you decide between a wired or wireless printer. If you value a clutter-free workspace and the flexibility to print from any room, a wireless printer could be ideal. But, if you’re like me and have experienced the frustration of a dropped Wi-Fi connection mid-print, a wired connection might be more reliable. Wired printers often provide a more stable connection and faster data transfer, which can be crucial for high-volume printing tasks. Think about your space and how you’ll be using your printer daily. Will you need to print from multiple devices or locations? Your answers will guide you to the best choice.
Credit: www.hp.com
Prepare The Printer
Connecting your printer to a desktop computer involves plugging the printer’s USB cable into the computer’s USB port. After connecting, install the printer driver software from the manufacturer’s website or the installation CD. Follow on-screen instructions to complete the setup process smoothly.
Preparing your printer is a crucial step before connecting it to your desktop computer. Whether you’re setting up a printer for the first time or you’re a seasoned pro, taking the time to properly prepare your printer can save you from headaches down the road. Let’s break down the preparation process into simple steps to ensure a smooth setup experience.Unpack And Assemble
Start by carefully removing the printer from its box. Make sure you have all the components, such as cables, manuals, and any included software. Missing something? Double-check the packaging or contact customer support. Next, assemble the printer by attaching any components like paper trays or feeders, which might be separate. This is usually straightforward, with parts designed to fit easily. It’s a bit like assembling a puzzle, but with fewer pieces. Keep the workspace clear and organized. It’s easier to spot something if it’s out of place, plus you’ll avoid the frustration of looking for a misplaced cable.Install Ink Cartridges
Installing ink cartridges can be intimidating if you’ve never done it before. But it’s simpler than it seems. Open the printer cover to access the cartridge slots, usually marked clearly inside. Remove the cartridges from their packaging, making sure to peel off any protective tape. Insert them into the correct slots—color-coded guides are often in place to assist you. Listen for a click to ensure they’re securely installed. It’s satisfying when you hear that sound because it means you’re on the right track.Load Paper
Loading paper is often the final step in preparing your printer. Adjust the paper guides in the tray to match the size of the paper you’re using. This prevents jams and ensures proper alignment. Place a stack of paper in the tray, but be careful not to overfill it. Too much paper can lead to feeding issues. Close the tray gently. It’s a small action, but it signifies you’re almost ready to connect your printer to your desktop and start printing. Are you familiar with any of these steps? If so, you’re already on the path to becoming a printer setup pro. Taking the time to prepare your printer well can make the rest of the connection process much more straightforward. What step do you find most challenging?Connect Printer Via Usb
Connecting a printer to your desktop computer using a USB is simple. This method is reliable and quick. USB connections provide stable data transfer. Follow these steps to connect your printer.
Locate Usb Port
First, find the USB port on your computer. Desktop computers usually have USB ports on the back. Some may have them on the front. Look for a port that fits the USB cable.
Attach Usb Cable
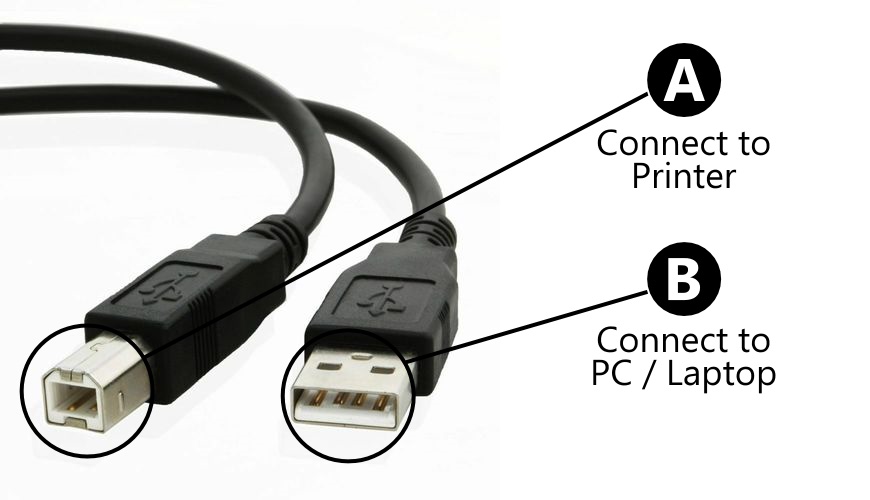
Take the USB cable that came with your printer. Plug one end into the printer’s USB port. Insert the other end into the computer’s USB port. Ensure the cable is secure and snug.
Power On Printer
Turn on your printer after connecting the USB cable. Look for the power button on the printer. Press it to start the device. Your computer may detect the new hardware. Follow any setup prompts on your screen.
Set Up Wireless Connection
Setting up a wireless connection for your printer is simple. It lets you print from anywhere within your home or office. No more clutter of cables. Enjoy the freedom of wireless printing. Let’s explore how to establish this connection.
Access Printer Settings
First, turn on your printer. Check if it’s ready for setup. Then, go to the printer’s control panel. Find the settings menu. Look for ‘Network’ or ‘Wireless Settings’. Select it to proceed.
Connect To Wi-fi Network
Once in wireless settings, locate the Wi-Fi setup option. Choose your Wi-Fi network from the list. Enter your Wi-Fi password carefully. Ensure it’s correct to avoid errors. Confirm the connection. The printer should connect to the network.
After connecting, test the setup. Send a document to print from your computer. Confirm it’s working perfectly. Now, enjoy the convenience of wireless printing.
Install Printer Software
Connecting a printer to a desktop computer involves installing printer software. Follow simple steps to ensure a successful connection. Download the correct driver and follow prompts to complete installation.
Installing printer software is an essential step in connecting your printer to your desktop computer. Without the right software, your computer and printer can’t communicate properly. This might sound technical, but it’s a straightforward process that you can easily handle on your own. Think of it as setting up a new app on your phone. Follow these steps, and you’ll be printing in no time.Download Drivers
The first step is to download the necessary drivers for your printer. You can usually find these on the manufacturer’s website. Simply search for your printer model, and you’ll find the drivers listed under the support or downloads section. Ensure you download the correct driver for your operating system, whether it’s Windows, macOS, or another.Run Installation Wizard
Once you have the drivers, it’s time to run the installation wizard. This is a guided setup that helps you install the software. Locate the downloaded file on your computer, usually in the Downloads folder. Double-click it to start the installation process. Follow the on-screen instructions. You might be prompted to connect your printer to your computer using a USB cable during this process. If you’re opting for a wireless setup, ensure your printer is on and connected to the same Wi-Fi network as your computer. Have you ever felt stuck with tech? Running the installation wizard is like having a tech-savvy friend guiding you. It simplifies things and ensures you do everything correctly. Additional Tips – Check for Updates: After installation, check for any software updates. These can improve performance and fix potential issues. – Restart Your Computer: Sometimes, a quick restart can help finalize the installation. – Test Print: Once everything is set up, print a test page to ensure everything is working smoothly. What’s the most challenging part of setting up a printer for you? Understanding these steps can make a difference in turning a daunting task into a simple one.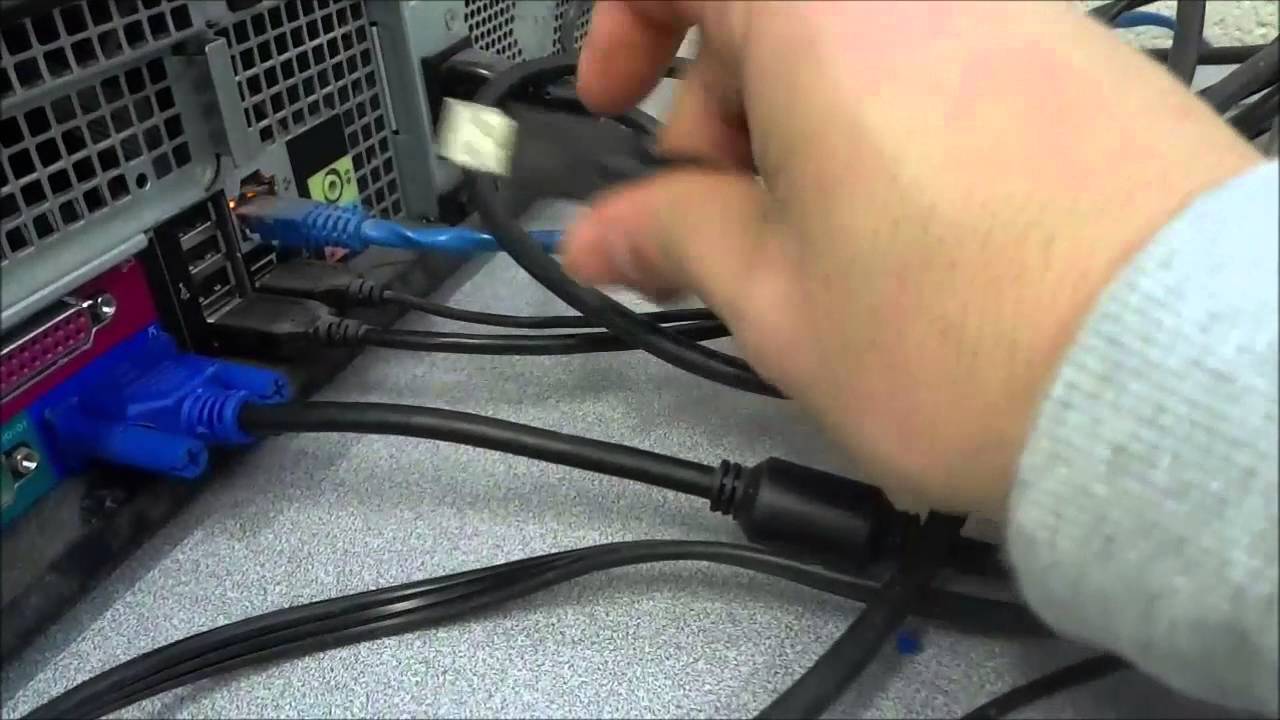
Credit: www.youtube.com
Configure Printer On Computer
Easily connect your printer to a desktop computer by plugging in the USB cable. Install necessary drivers from the printer’s website for smooth operation. Adjust settings through the control panel to complete the setup.
Configuring a printer on your desktop can seem daunting. But it’s straightforward with the right steps. You need to ensure your printer is correctly set up. This involves accessing the control panel, adding the printer, and setting it as the default. These steps will ensure a smooth printing experience.Access Control Panel
First, navigate to the control panel on your computer. Click on the “Start” button. Type “Control Panel” in the search box. Select the Control Panel from the list of results. This will open a new window with various options.Add Printer To System
Now, locate the “Devices and Printers” section. Click on “Add a printer.” Your computer will search for available printers. Select your printer from the list. Follow the on-screen instructions to complete the installation.Set As Default Printer
Once added, your printer needs to be set as default. Right-click on your printer icon. Choose “Set as default printer.” A green checkmark will appear. This indicates your printer is now the default. Your computer will send all print jobs to this printer automatically. This ensures a hassle-free experience every time you print.Test Printer Functionality
Ensure printer connectivity by using a USB cable or wireless method. Check settings on your computer for successful pairing. Confirm functionality through a test print to verify proper installation.
Testing the functionality of your printer after connecting it to your desktop computer is a crucial step to ensure everything is running smoothly. You don’t want to find out that there’s an issue when you’re in a hurry to print an important document. This stage is all about making sure your printer is ready to deliver top-notch prints whenever you need them.Print Test Page
Start by printing a test page. This is a simple process that helps verify that your printer and computer are communicating properly. Most printers come with a built-in feature to print a test page. You can usually access this function through the printer’s control panel or the software installed on your computer. The test page will include basic text, colors, and patterns that help diagnose common printing issues. It’s like a quick health check for your printer.Verify Print Quality
Once your test page has been printed, take a close look at the results. Is the text clear and sharp? Are the colors vibrant and true to life? If you notice any issues, such as streaks, faded colors, or blurry text, it might be a sign that your printer needs some maintenance. Consider running a cleaning cycle, checking the ink levels, or aligning the printer heads. Often, these small adjustments can make a big difference in print quality. Testing your printer not only ensures functionality but also gives you peace of mind. Have you ever skipped this step only to face a printing disaster at the worst possible moment? Taking a few minutes to test now can save you a lot of stress later on.Troubleshooting Tips
Connecting a printer to a desktop computer can sometimes be challenging. Troubleshooting common issues ensures a smooth setup process. This section offers practical tips to resolve connectivity problems and handle error messages effectively.
Resolve Connectivity Issues
First, check the cables between the printer and computer. Ensure they are securely plugged in. Sometimes cables loosen over time. If using a wireless printer, verify the network connection. The printer should be on the same Wi-Fi network as your computer. Restart the printer and computer. This can refresh the connection and solve minor glitches. Update printer drivers regularly. An outdated driver can cause connectivity issues. Visit the printer manufacturer’s website for the latest version.
Check the computer’s settings. Ensure the printer is set as the default device. Sometimes multiple printers are listed. Select the correct one from the list. Run the printer troubleshooter found in the computer’s settings. This tool can automatically find and fix common issues.
Handle Error Messages
Error messages can appear for various reasons. Read the message carefully. It often gives clues about the problem. Paper jams are a frequent cause of errors. Open the printer and remove any stuck paper. Ensure there is enough paper in the tray. Check for empty or misaligned ink cartridges. Reinstall them if necessary. If an error mentions ink levels, replace low cartridges.
Software errors can be tricky. Restart the print spooler service on your computer. This can clear pending print jobs and fix some errors. Look for error codes. They can be searched online for specific solutions. Always consult the printer manual for detailed troubleshooting steps.
Credit: www.tennantsuk.com
Frequently Asked Questions
How Do I Install Printer Drivers?
To install printer drivers, download them from the manufacturer’s website. Follow installation prompts carefully. Ensure your printer is connected via USB or network. Restart your computer if necessary. This process ensures your printer communicates effectively with your desktop computer, allowing seamless printing tasks.
Can I Connect A Printer Wirelessly?
Yes, you can connect a printer wirelessly. Ensure your printer supports Wi-Fi connectivity. Access your computer’s settings to add a new device. Follow on-screen instructions to connect. Ensure both devices are on the same network for successful pairing.
Why Isn’t My Printer Connecting?
Check cable connections or Wi-Fi settings if your printer isn’t connecting. Restart both devices. Update printer drivers and software. Ensure your printer is compatible with your computer’s operating system. Following these steps usually resolves connection issues.
What Cable Do I Need To Connect?
You’ll need a USB cable to connect most printers. Ensure the cable matches your printer’s port type. Alternatively, some printers connect using Ethernet cables. Check your printer’s manual for specific requirements. Proper cabling ensures stable connectivity between devices.
Conclusion
Connecting your printer to a desktop is simpler than it seems. Follow the steps to ensure a smooth setup. Check cables and ports for secure connections. Install the necessary drivers from the printer’s website. Test print a page to confirm everything works.
Troubleshooting tips can solve common issues quickly. With these steps, your printer should work seamlessly. Enjoy easy printing from your desktop! Stay updated on new printer features and software. This ensures you get the best performance. Happy printing!



