
Affiliate Disclosure: This post may contain affiliate links. If you purchase through links on our site, we may earn an affiliate commission at no extra cost to you.
Imagine the thrill of playing your favorite video game on a console you built with your own hands. It’s not just about the gameplay; it’s about the pride and satisfaction of creating something uniquely yours.
A DIY video game console isn’t just a project; it’s an adventure, a way to dive deep into the world of gaming technology without breaking the bank. You might think building your own console is too complicated or time-consuming. But what if I told you that with the right guidance, you can turn this challenging task into a fun and rewarding experience?
Stick around, because you’re about to discover how to transform a pile of components into a gaming marvel.
Choosing The Right Components
Selecting the right components is crucial for building a DIY video game console. Choose a powerful processor, ample RAM, and a quality graphics card to ensure smooth gameplay. Ensure compatibility of parts to avoid issues during assembly and gameplay.
Building your own DIY video game console is an exciting journey that combines creativity and technical skills. One of the crucial steps in this process is choosing the right components. The components you select will determine the performance and capabilities of your console. Let’s dive into the essential parts you need to consider, starting with the hardware.
Essential Hardware Parts
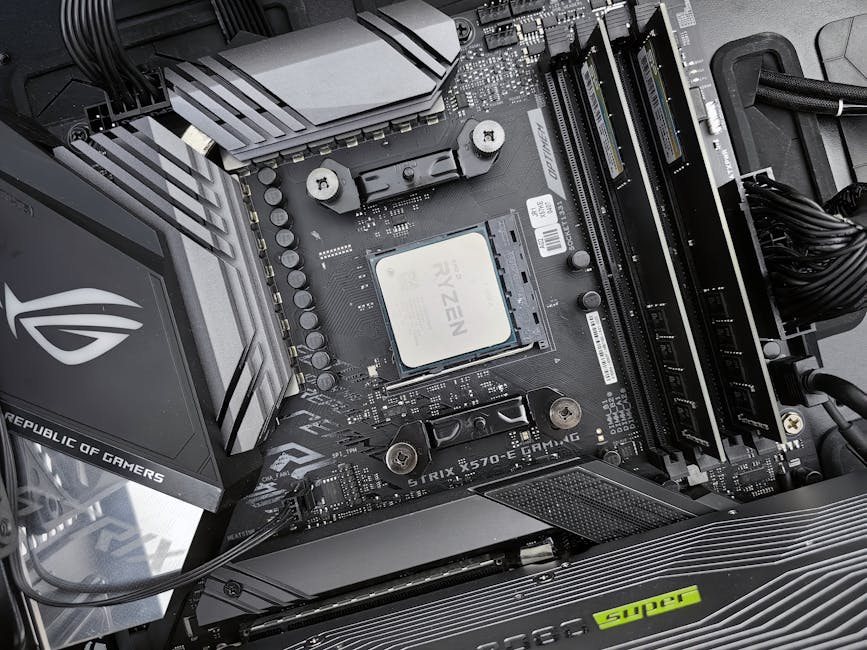
The heart of your DIY video game console lies in its hardware. You need a motherboard, processor, RAM, storage, and a power supply. The motherboard acts as the central hub, connecting all other components. RAM is your console’s short-term memory. It needs to be fast and reliable for smooth gameplay. You can choose from different types like DDR3 or DDR4, depending on the motherboard. Storage options range from hard drives to solid-state drives (SSDs). SSDs are faster but more expensive, while hard drives offer more space for less cost. Consider what suits your needs best.
Selecting A Suitable Processor
The processor is the brain of your console. It handles all the calculations and processes that keep games running smoothly. You might wonder how much processing power you need. If you plan to run complex games, opt for a multi-core processor. Brands like AMD and Intel offer a variety of processors that cater to different budgets and performance needs. Research the compatibility of the processor with your motherboard. Check the socket type and chipset to ensure they match. It’s a common mistake to buy an incompatible processor.
Finding Compatible Graphics Options
Graphics determine the visual quality of your games. A dedicated graphics card (GPU) can enhance the gaming experience. But do you need an expensive one? Consider the types of games you want to play. For casual gaming, an integrated GPU might suffice. However, for high-resolution or VR games, invest in a dedicated GPU. Look at the power requirements and make sure your power supply can handle the GPU. Compatibility with the motherboard is also key. Check for the right slots and connections. Choosing the right components is a balance between performance, cost, and future-proofing your console. As you make these decisions, remember that your console should reflect your gaming ambitions and budget constraints. Are you ready to start building?
Setting Up The Software
Setting up the software for your DIY video game console is crucial. It determines the performance and flexibility of your gaming system. Selecting the right software components can enhance your gaming experience. Below, we explore key areas to focus on.
Operating System Choices
Choosing an operating system is the first step. Popular options include Linux, Windows, and Android. Linux is favored for its open-source nature and customization. Windows offers a user-friendly interface and broad compatibility. Android is great for mobile-focused gaming consoles. Each choice impacts the games you can run and the hardware compatibility.
Installing Game Development Tools
Game development tools are essential for creating and modifying games. Install tools like Unity or Godot for game development. These platforms offer intuitive interfaces and extensive libraries. Unity is excellent for 3D game development. Godot is known for its flexibility and ease of use. Both provide tutorials to help beginners get started.
Configuring Emulator Software
Emulators let you play games from different consoles. Configure software like RetroArch or Dolphin to run classic games. RetroArch supports a wide range of systems. Dolphin specializes in GameCube and Wii games. Adjust settings for optimal performance. Emulators can require tweaking for smooth gameplay. Ensure your hardware meets the emulator’s requirements.
Designing The Console Shell
Creating a console shell transforms a DIY video game console into a personal masterpiece. Choose materials wisely for a unique design. Focus on functionality and style to enhance the gaming experience.
Designing the console shell for your DIY video game console is where creativity meets practicality. It’s the stage where your vision takes physical form. Whether you’re aiming for a sleek, modern look or something with retro charm, this process lets you bring your unique style to the forefront. Designing isn’t just about aesthetics; it’s about functionality and making sure everything fits well. Let’s dive into the specifics of crafting your console shell, ensuring that you have both the right materials and an engaging design.
Materials And Tools Needed
Before you begin, gather all necessary materials and tools. This step ensures a smooth process without interruptions. You’ll need plastic sheets or wood panels for the shell, depending on your preference. Consider the tools: a saw or laser cutter will help shape your materials. Screwdrivers, glue, and sandpaper are essential for assembly and finishing. Make sure you have a ruler or tape measure for precise measurements. Having everything ready will keep your project on track.
Creating A Custom Design
This is your chance to personalize your console. Think about the design that resonates with you. Do you want it to mimic a classic console, or something completely unique? Sketch your ideas on paper first. This helps visualize the end product before cutting materials. Use a 3D modeling software if you want a more detailed plan. Remember to consider airflow and port placement in your design. Poor planning here can lead to overheating issues later.
Assembling The Console Case
Once your materials are cut, it’s time to assemble. Begin by arranging all pieces on a flat surface. This gives you a clear view of how they fit together. Attach the panels using screws or strong adhesive. Make sure each joint is secure to prevent future issues. Double-check alignments to keep everything straight. I’ve had a console that looked great, but an uneven side made it wobble. Finally, test fit the components inside. Ensure there’s enough space for each part, particularly for airflow. Adjust as needed before finalizing the assembly. This proactive step saves time and frustration later. Have you thought about future modifications? Designing with flexibility in mind can allow for easy upgrades. Keep this in mind as you finalize your console shell.
Programming Your Games
Crafting your own DIY video game console is a thrilling adventure. Imagine designing games that reflect your unique vision. With simple tools and creativity, you can bring your dream games to life.
Programming your own video games on a DIY console can be a thrilling adventure. It’s not just about playing games anymore; it’s about creating them. You get to craft experiences, challenge your skills, and perhaps even surprise yourself with what you can achieve. Whether you’re a seasoned coder or a curious beginner, diving into game programming opens a world of creativity. But where do you begin?
Basic Programming Languages
Starting with programming languages is crucial. Languages like Python and JavaScript are excellent choices for beginners due to their readability and ease of use. Python, with its simple syntax, allows you to focus more on game mechanics rather than getting bogged down by complex coding rules. JavaScript is perfect if you’re interested in web-based games, providing you with powerful tools to bring your ideas to life. When I first started, I chose Python because it was less intimidating. It helped me build confidence and understand the basics of game programming. Choosing the right language can set the tone for your programming journey. Which language will you choose?
Game Development Platforms
Once you’re comfortable with a programming language, it’s time to explore game development platforms. Tools like Unity and Godot are popular for their user-friendly interfaces and robust features. Unity offers extensive tutorials and a vast community, making it easier for you to find help and resources. Godot, on the other hand, is open-source and lightweight, ideal for indie developers. I remember my first game using Unity; the sense of achievement was immense. These platforms are not just tools; they are your playgrounds. They provide the canvas where your coding skills translate into vibrant, interactive games. Have you thought about which platform aligns with your creative vision?
Testing And Debugging
Testing and debugging are vital components of game development. Ensuring your game runs smoothly is key to providing an enjoyable experience. Regular testing allows you to spot errors early and rectify them before they become major issues. Debugging is your opportunity to refine your game, enhancing both performance and player satisfaction. A tip from my early days: always test your game on different devices to catch unexpected bugs. Don’t rush this phase. Patience and attention to detail can save you from future headaches. Are you prepared to test your creation rigorously? By starting with basic programming languages, choosing the right development platforms, and committing to thorough testing and debugging, you can transform your DIY video game console into a vessel of creativity. How far will you let your imagination take you?
Enhancing The Gaming Experience
Crafting a DIY video game console offers a unique way to enhance gaming experiences. Building your own console allows customization, creating a personalized gaming setup tailored to your preferences. Enjoy the satisfaction of playing games on a system you designed yourself, adding a personal touch to your gaming adventures.
Enhancing the Gaming Experience Building your own DIY video game console is a thrilling journey. It’s more than just assembling parts; it’s about creating a custom gaming experience that suits your preferences. Let’s dive into how you can elevate your gaming setup with some practical enhancements.
Integrating Controllers
Controllers are your main interaction point with the game. Choose controllers that are comfortable and responsive. Consider using wireless options for a cleaner setup. If you’re nostalgic, retro-style controllers can add a unique touch. Look for those that offer easy connectivity with your console.
Adding Audio And Visual Effects
Sound and visuals dramatically impact your gaming experience. Invest in a quality sound system or headphones for immersive audio. Enhance visuals with customizable LED lights. These can sync with game events, creating a dynamic atmosphere. Experiment with different colors and patterns to find what excites you.
Optimizing Performance
Performance is key for smooth gameplay. Ensure your console hardware is up to date and capable of handling high-demand games. Regularly clean your console to prevent overheating. Use efficient cooling solutions like fans or heat sinks. These small steps can keep your console running at peak performance. Enhancing your DIY video game console involves thoughtful choices and personal touches. What elements do you think will take your gaming to the next level?
Credit: leandrolinares.com
Troubleshooting Common Issues
Building your own DIY video game console is an exciting project. Sometimes, you might face common issues that can be frustrating. Understanding these problems helps in resolving them quickly. Let’s explore some frequent challenges and their solutions.
Hardware Malfunctions
Hardware issues often arise due to loose connections. Check all cables and connectors. Ensure everything fits snugly. Damaged components also cause malfunctions. Inspect your hardware for visible damage. Replace any faulty parts promptly. Overheating can lead to hardware failure too. Monitor your console’s temperature regularly. Use fans or heat sinks to keep it cool.
Software Glitches
Software glitches can disrupt gaming. Regular updates help maintain smooth performance. Always use the latest software versions. Bugs may cause games to crash. Check for patches from developers. Install them as soon as they become available. Sometimes, corrupted files create glitches. Reinstall the affected software to fix this issue. Back up your data to avoid loss.
Performance Bottlenecks
Performance bottlenecks slow down your console. Insufficient memory is a common cause. Upgrade your RAM to improve speed. Background applications can drain resources. Close unnecessary programs while gaming. Old graphics drivers also affect performance. Keep your drivers updated for optimal function. Consider optimizing your system settings. It enhances performance without new hardware.
Future Upgrades And Modifications
Building your own DIY video game console is a thrilling experience. But what happens after you’ve got it up and running? The adventure doesn’t stop there! With countless possibilities for future upgrades and modifications, your console can evolve to meet new gaming demands and personal preferences. Let’s dive into some exciting ways you can enhance your DIY console.
Expanding Storage Capacity
Running out of space for games and apps can be frustrating. Have you ever wished you could download more without deleting old favorites? Expanding storage capacity is a game-changer. Consider adding a larger hard drive or an SSD for faster access to your games. External storage options like USB drives can also keep your library vast and varied. What’s your plan for managing storage effectively?
Upgrading Graphics Capabilities
Imagine playing your favorite game with enhanced visuals. Upgrading your graphics capabilities can make this a reality. Swap out your current GPU for a more powerful model to enjoy smoother frame rates and higher resolutions. You could also look into software upgrades that optimize graphics performance. How will you enhance your gaming experience with better graphics?
Exploring Vr And Ar Integration
Virtual reality and augmented reality are the future of gaming. Integrating VR and AR into your console can open new dimensions in gameplay. Consider peripherals like VR headsets and AR glasses to dive deeper into immersive worlds. You might even experiment with developing your own AR game experiences. Are you ready to step into a new realm of interactive gaming?
Each of these upgrades offers unique benefits that can transform your DIY console into a powerhouse of entertainment. As you consider these modifications, reflect on what kind of gaming experience you desire. Which upgrade will you tackle first?
Frequently Asked Questions
How To Start Building A Diy Video Game Console?
To start, gather essential components like a microcontroller, power supply, and display. Research popular microcontrollers such as Raspberry Pi or Arduino. Follow online tutorials or community forums for guidance. Ensure you have the necessary tools like soldering equipment. Begin with simple projects to understand the basics before advancing.
What Components Are Needed For A Diy Console?
You’ll need a microcontroller, power supply, display, and input devices like controllers. Consider additional features like sound modules and connectivity options. Research compatible components to ensure seamless integration. Tools such as soldering kits and a breadboard are essential. Choose components based on your budget and desired functionality.
Can I Use Raspberry Pi For A Game Console?
Yes, Raspberry Pi is popular for DIY game consoles. It offers versatility and supports various emulation software. It’s affordable and has a large community for support. Ensure you have the necessary peripherals like controllers and a display. Follow online tutorials for setup guidance and tips on optimizing performance.
Is Programming Knowledge Necessary For Diy Consoles?
Basic programming knowledge is helpful but not mandatory. Many tutorials provide step-by-step instructions, simplifying the process. Familiarize yourself with programming languages like Python or C++. Utilize online resources and forums for troubleshooting. Start with simple projects to gain confidence before tackling more complex tasks.
Conclusion
Building your own video game console can be fun and rewarding. You gain new skills. You explore creativity. Plus, you save money. This project offers a unique experience. It makes technology more approachable. You learn while having fun. You enjoy games in a new way.
With patience and effort, the console becomes a reality. Challenge yourself. Dive into this DIY adventure. Create memories and enjoy your games. Embrace the joy of making something yourself. Share your creation with friends. The possibilities are endless. Start your project today.
Enjoy the process and the result. Happy gaming!



