Affiliate Disclosure: This post may contain affiliate links. If you purchase through links on our site, we may earn an affiliate commission at no extra cost to you.
Capturing the enchanting beauty of the moon can be a thrilling experience. Yet, when you point your camera skyward, you might find your photos don’t quite do justice to the moon’s majestic glow.
You may feel frustrated that what you see doesn’t match what you capture. But don’t worry; you’re not alone. Many photographers face this challenge. The secret lies in using the right camera settings. Imagine transforming your moon photos from blurry blobs to stunning images that truly reflect its wonder.
This article is here to guide you step-by-step, ensuring you make the most out of your camera. You’ll discover the best settings that will turn your moon shots into captivating masterpieces. Dive in and learn how to make your lunar photography shine!
Equipment Essentials
Capturing breathtaking moon photos requires the right equipment. The right tools can make a difference. This section covers essential gear for moon photography. Learn about the best camera, lens, and tripod choices.
Choosing The Right Camera
Selecting the right camera is crucial. A DSLR or mirrorless camera works best. These cameras offer manual settings for control. Ensure your camera has good low-light performance. This helps capture moon details clearly. High ISO capabilities are important. They minimize noise in low-light shots.
Lens Selection
The right lens enhances your moon photos. A telephoto lens is ideal. It allows you to zoom in on the moon. Look for a lens with a focal length of at least 200mm. This brings the moon closer in your shots. A lens with a wide aperture is beneficial. It lets more light into your camera. This is useful for capturing sharp details.
Tripod Necessities
A sturdy tripod is a must-have. It keeps your camera steady during long exposures. Even slight movement can blur your photos. Choose a tripod that is easy to adjust. Make sure it can support your camera’s weight. A tripod with a ball head offers flexibility. You can quickly change angles without hassle.
Optimal Camera Settings
Capturing the moon’s beauty involves understanding optimal camera settings. Proper settings bring out detail and clarity. They help you avoid common pitfalls like overexposure or blur. Let’s explore key settings for stunning moon photos.
Iso Preferences
ISO affects your photo’s brightness. Low ISO like 100 or 200 is ideal. It reduces noise and keeps the image sharp. Higher ISO might brighten the shot but can cause graininess. Use low ISO for cleaner moon images.
Aperture Choices
Aperture controls light entry and depth of field. A smaller aperture like f/11 or f/16 works well. It ensures the moon stays in focus. This setting helps capture more detail. Avoid wide aperture; it can blur the moon.
Shutter Speed Tips
Shutter speed determines exposure length. A fast shutter speed like 1/125 or 1/250 seconds is best. It prevents motion blur from the moon’s movement. Slow shutter speeds risk overexposure. Fast speeds ensure crisp, clear moon images.
Manual Focus Techniques
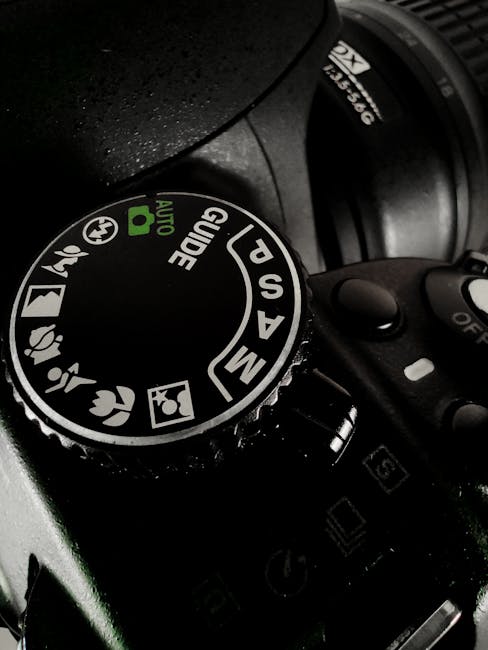
Capturing the moon requires careful camera settings and manual focus techniques. Use a tripod for stability and set your camera to manual mode. Adjust the ISO to 100 or 200 for clear shots. Set the aperture to f/11 and experiment with shutter speed to find the best exposure.
Capturing stunning images of the moon can be a thrilling experience. But achieving those crystal-clear shots often hinges on mastering manual focus techniques. Many photographers find themselves battling blurry images due to improper focus settings. By taking control of your camera’s focus manually, you can ensure that your lunar photos are sharp and captivating. Let’s delve into some essential tips that will elevate your moon photography game.
Focusing On The Moon
When focusing manually on the moon, start by using your camera’s live view mode. This gives you a real-time preview, allowing you to adjust the focus precisely. Zoom in digitally on the moon within the live view to get a closer look at the details. Once you’re zoomed in, slowly adjust the focus ring on your lens until the surface details become sharp and clear. A practical tip is to use a tripod to keep your camera steady. This stability helps maintain focus without any unintended blurring caused by hand movements.
Avoiding Autofocus
Autofocus can be helpful in many scenarios but is often unreliable for moon photography. Your camera might struggle to lock onto the moon due to its brightness and distance. Switching to manual focus gives you control and eliminates the uncertainty of autofocus hunting for clarity. Think about this: Have you ever tried capturing the moon, only to find your camera focused elsewhere? Manual focus prevents this distraction and centers your attention solely on your celestial subject. Remember, practice is key. Take a few test shots to refine your technique. Each time you photograph the moon, you’ll gain more confidence and skill in manual focusing.
Credit: store.bandccamera.com
Exposure And Lighting
Capturing stunning moon photos requires precise exposure and lighting settings. Adjust the ISO to a low level, around 100, for sharp images. Use a narrow aperture, like f/11, to enhance clarity and detail.
Capturing the moon in all its glory requires a keen understanding of exposure and lighting. These elements are vital because they determine how well the details of the moon are captured in your photographs. Balancing exposure and utilizing natural light can dramatically enhance the quality of your moon photos. Let’s dive deeper into these aspects to help you create stunning moon imagery.
Managing Overexposure
One common mistake in moon photography is overexposure. Have you ever noticed your moon shots looking more like a bright blob than a detailed celestial body? This happens when your camera’s sensor receives too much light. To avoid this, set your camera to manual mode. This gives you full control over your exposure settings. Keep the ISO low, around 100-200, to reduce sensitivity to light. Next, adjust the aperture to a high f-stop number like f/11 or f/16. This will help limit the light entering the lens. Finally, use a fast shutter speed, such as 1/125 or 1/250, to prevent overexposure. Experiment with these settings, and review your shots. Does the moon appear crisp and detailed? If not, make small adjustments until you see the desired results.
Utilizing Natural Light
Natural light plays a crucial role in moon photography. The moon reflects sunlight, and this is what we capture in our images. Timing is everything. Shoot during different moon phases to see how lighting changes. A full moon will be much brighter than a crescent moon. You might find that the best time to shoot is during the twilight hours when the sky is darker, but the moon is still bright. Also, consider your location. Are there city lights affecting the natural light on the moon? Move to a spot with minimal light pollution for clearer shots. Remember, practice makes perfect. How will you leverage natural light to make your moon photos stand out? Try capturing the moon at various times to see how the lighting evolves. By mastering exposure and lighting, you’ll transform your moon photography from ordinary to extraordinary.
Using Filters
Capturing stunning moon photos often requires using filters to manage brightness and enhance details. Filters can reduce glare and highlight features on the moon’s surface, allowing clearer and more defined images. Experimenting with various filters can significantly improve the quality of your moon photography.
Capturing stunning moon photos requires more than just a camera. Filters play a vital role in enhancing the quality of your moon images. They help manage light, reduce glare, and add depth to your photos. Whether you’re an amateur or a seasoned photographer, understanding the right filters can elevate your lunar photography game. Let’s explore the types of filters and their benefits, especially polarizing filters.
Types Of Filters
Different filters serve different purposes in moon photography. Neutral density filters reduce the amount of light entering the lens. This helps in capturing the moon’s details without overexposure. UV filters protect your lens from dust and scratches. They also enhance image clarity by blocking ultraviolet light. Each filter type has a specific function that can improve your moon photos significantly.
Benefits Of Polarizing Filters
Polarizing filters reduce glare and reflections. This is especially useful when shooting the bright moon. They enhance contrast and color saturation, making the moon’s surface details pop. Using a polarizing filter can also help in capturing the night sky with better clarity. It ensures that your moon photos have vivid details and rich textures.
Post-processing Tips
Capturing stunning moon photos requires precise camera settings. Use a low ISO for clarity and reduce noise. A fast shutter speed freezes the moon’s movement, while a narrow aperture enhances detail. Adjust white balance for true moon colors.
Capturing the moon in all its glory can feel magical, but the magic doesn’t stop at snapping the shutter. Post-processing is where your moon photos truly come alive, allowing you to enhance details and adjust colors to reflect what you saw in the night sky. With a few key techniques, you can transform your already stunning moon photos into breathtaking pieces of art.
Enhancing Details
Sharpening is your friend when it comes to bringing out the craters and textures on the moon’s surface. Use the sharpening tools in your photo editing software to make these details pop without overdoing it. Too much sharpening can introduce noise, so keep an eye on the image quality as you adjust. Consider adjusting the contrast to highlight the moon’s features. A subtle increase can make a significant difference, making the shadows deeper and the highlights more pronounced. This balance helps to create a more three-dimensional effect, bringing the moon to life. Have you tried using the clarity slider? It can enhance mid-tone contrast, giving your moon photo a crisper appearance. Experiment with small adjustments to see what works best for your image.
Color Correction
Accurate color representation can make your moon photos more captivating. Often, moon photos can appear washed out or have a color cast due to the camera’s white balance settings. Adjust the white balance in post-processing to correct this and bring out the moon’s natural shades. When editing, you might notice the moon has hints of blue or yellow. This can be adjusted using the temperature and tint sliders. Aim for a natural look that reflects what you saw in the sky. Sometimes adding a slight color tone can enhance the mood of your photo. A touch of cool blue or warm yellow can dramatically change the atmosphere of your image. Play around with these tints to see which adds more depth and emotion to your shot. Have you ever thought about how post-processing can elevate your moon photography? Share your experiences and tips in the comments, and let’s refine our skills together!
Common Mistakes
Capturing the moon’s beauty requires skill and precision. Many photographers make common mistakes that ruin their moon photos. Understanding these mistakes can help improve your shots. Let’s explore some typical errors and how to avoid them.
Avoiding Blurry Images
Blurry moon photos frustrate photographers. The moon moves faster than it seems. Use a fast shutter speed to freeze its motion. A tripod is essential for stability. It prevents camera shake. Ensure your focus is sharp. Use manual focus for better control.
Preventing Noise Issues
High ISO settings cause noise in moon photos. Noise appears as grainy spots. It reduces image clarity. Choose a low ISO setting to minimize noise. Use a wider aperture to let in more light. This compensates for the lower ISO. Post-processing can reduce noise. But it should not replace proper settings.
Frequently Asked Questions
What Iso Setting Is Best For Moon Photos?
For moon photos, use a low ISO setting like 100 or 200. This minimizes noise and captures the moon’s details sharply. A low ISO helps maintain image quality and ensures a clear shot. Adjust other settings like aperture and shutter speed accordingly for the best results.
Should I Use A Tripod For Moon Photography?
Yes, using a tripod is essential for moon photography. It stabilizes your camera, preventing blurry images due to hand movement. A tripod allows for longer exposures and better composition. It ensures sharp and detailed moon images, especially when using high zoom levels.
What Shutter Speed Is Ideal For Moon Shots?
An ideal shutter speed for moon shots is around 1/125 to 1/250 seconds. This speed helps capture the moon’s details without overexposing. Adjust based on your camera’s capabilities and lens. Proper shutter speed balances light and detail, ensuring a crisp image.
Which Aperture Setting Suits Moon Photography?
For moon photography, use a small aperture setting like f/11 or f/16. This allows for greater depth of field and sharpness. A smaller aperture enhances image clarity by reducing lens aberrations. It ensures the moon’s texture and craters are well-defined.
Conclusion
Capturing stunning moon photos is within your reach. Start with a tripod for stability. Adjust ISO settings to reduce noise. Use manual focus to sharpen details. Choose a small aperture for clarity. Experiment with shutter speed for brightness. Check your results and tweak settings.
Practice makes perfect. Soon, your moon photos will impress. Share your work with friends. Inspire others with your images. Keep exploring different techniques. Enjoy the process of learning and improving. The moon awaits your camera. Happy shooting!