
Affiliate Disclosure: This post may contain affiliate links. If you purchase through links on our site, we may earn an affiliate commission at no extra cost to you.
Are you ready to boost your computer’s performance by changing its CPU? Upgrading your desktop’s central processing unit can feel like giving your machine a new lease on life.
Whether you’re a tech enthusiast or a curious beginner, changing a CPU might seem daunting at first. But don’t worry; you’ve come to the right place. We’ll guide you step-by-step through the process, ensuring you have the confidence and knowledge to tackle the task with ease.
Imagine the thrill of powering up your computer and experiencing faster processing speeds and better performance. By the end of this guide, you’ll be ready to transform your desktop and enjoy a smoother computing experience. Let’s get started!
Tools And Materials Needed
Changing a CPU in a desktop requires the right tools and materials. Proper preparation ensures a smooth and successful process. Using the correct items prevents damage and ensures efficiency. Below is a detailed list of essentials you’ll need.
1: Screwdriver Set
A screwdriver set is crucial for opening the computer case. Ensure you have both Phillips and flat-head screwdrivers. This helps in handling different types of screws.
2: Thermal Paste
Thermal paste aids in heat transfer between the CPU and cooler. Apply a small amount to the CPU before installing the cooler. It prevents overheating and improves performance.
3: Anti-static Wrist Strap
Use an anti-static wrist strap to protect components from static electricity. Attach it to your wrist and a grounded metal part. This prevents accidental damage to sensitive parts.
4: Microfiber Cloth
A microfiber cloth is perfect for cleaning the CPU and cooler. It removes dust and old thermal paste without scratching surfaces. Keep the area clean for better performance.
5: Cpu Socket Cover
Use a CPU socket cover to protect the motherboard socket. It shields delicate pins from damage during installation. Always cover the socket when the CPU is removed.
6: Compressed Air Can
A compressed air can clears dust from the CPU socket and cooler. Regular cleaning ensures optimal airflow and cooling. It extends the life of your components.
Gather all these tools and materials before you start. Being prepared makes the process efficient and stress-free. Ensure everything is within reach for a seamless CPU change.
Preparing The Workspace
Preparing the workspace is crucial before changing a CPU in a desktop computer. This ensures a smooth and safe process. A well-organized space helps prevent damage and loss of components. Follow these steps to prepare your workspace effectively.
Ensuring Safety And Static Precautions
Safety is a top priority. Turn off your computer and unplug it from the wall. This prevents electrical accidents. Ground yourself to avoid static buildup. Static can harm computer parts. Use an anti-static wrist strap or touch a metal surface. This discharges any static electricity.
Organizing Tools And Components
Gather all necessary tools before starting. You need a screwdriver and thermal paste. Lay out your tools neatly. This makes them easy to find. Keep your new CPU and other parts close by. Organize them on a clean, flat surface. Avoid clutter to prevent losing small parts.
Label cables and screws as you remove them. This helps during reassembly. A clear workspace enhances focus. It minimizes errors and speeds up the process.
Removing The Old Cpu
Begin by gently removing the old CPU from the motherboard. Ensure all connections are detached before lifting it out. Handle with care to avoid damaging the pins or the socket.
Changing a CPU in your desktop computer might seem like a daunting task, but with the right guidance, it’s definitely within reach. Whether you’re upgrading for better performance or replacing a faulty processor, removing the old CPU is the first crucial step. It’s a bit like taking out an old book from a shelf to make room for a new favorite. Let’s break this process down so you can feel confident tackling it yourself.
Powering Down And Unplugging
Before you dive into your computer, ensure it’s completely powered down. Save your work and shut down the system through your operating system. Once the screen goes black, unplug the power cable from the wall and your computer. Don’t stop there—unplug all peripherals. This includes your monitor, keyboard, and any USB devices. It’s a bit like creating a safe zone, ensuring no accidental power surge can affect your components.
Opening The Computer Case
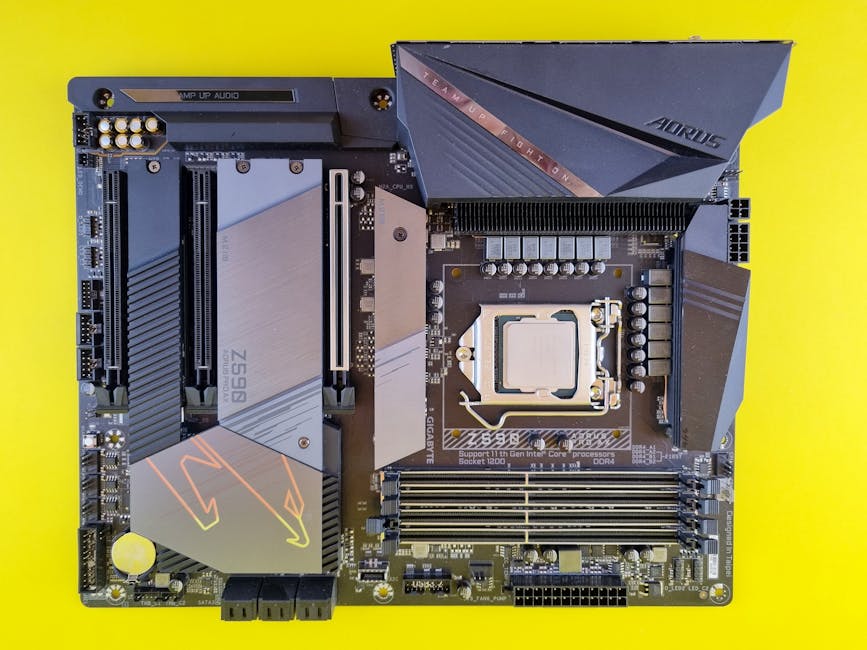
With everything unplugged, locate the screws or latches on the back of your computer case. Use a screwdriver if needed to remove these, and gently slide or lift the panel off. Take a moment to familiarize yourself with the internal layout. Spot the CPU cooler, which usually looks like a fan or heat sink sitting right over the CPU socket on the motherboard.
Detaching The Cpu Cooler
The CPU cooler needs to come off before you can reach the processor. Typically, you’ll find screws or clips securing it in place. Carefully unscrew or unclip them, and lift the cooler off the CPU. If the cooler doesn’t budge, it might be stuck due to thermal paste. A gentle twist can break this bond. Remember to handle it delicately to avoid damaging the cooler or surrounding components.
Releasing The Cpu From The Socket
Now, it’s time to release the CPU itself. Locate the small lever or latch next to the CPU socket. Gently push or lift it to unlock the processor. Once unlocked, you can lift the CPU straight up and out of the socket. Ensure you hold it by the edges to avoid touching the delicate pins underneath. Have you ever thought about how such a small piece of hardware can hold so much power? Removing a CPU is a straightforward process, but it requires attention to detail. Are you ready to give your desktop a new lease on life with a new processor?
Installing The New Cpu
Replacing a CPU in your desktop can enhance performance significantly. Installing the new CPU is a crucial step. It requires attention to detail and proper execution. Follow these steps to ensure a smooth process.
Checking Cpu Compatibility
Ensure your new CPU matches the motherboard socket. Verify compatibility with your motherboard specifications. Check the CPU’s power requirements. Ensure it suits your power supply capacity. Matching these specs avoids future issues.
Inserting The New Cpu
Begin by locating the CPU socket on the motherboard. Carefully remove the protective covering. Align the new CPU with the socket notches. Gently place the CPU into the socket. Avoid forcing it into place.
Securing The Cpu In The Socket
Once the CPU is inserted, secure it with the retention lever. The lever should lock the CPU firmly. Ensure it feels stable and secure. Double-check for any visible gaps. A secure fit ensures proper operation.
Reattaching The Cpu Cooler
Reattaching the CPU cooler is crucial after installing a new CPU. Ensure it is firmly seated for effective cooling. Secure it in place with the appropriate screws, ensuring optimal performance and preventing overheating.
Reattaching the CPU cooler is crucial for maintaining optimal performance. After replacing your CPU, ensure the cooler is properly reattached. This prevents overheating and ensures efficient operation. Let’s look at the steps involved in reattaching the CPU cooler.
Applying Thermal Paste
Thermal paste is essential for heat transfer. It sits between the CPU and cooler. Clean old paste from the CPU surface first. Use a small amount of new paste, about the size of a pea. Spread evenly across the CPU surface. This ensures proper contact and heat dissipation.
Mounting The Cooler Properly
Secure the cooler firmly onto the CPU. Align it with the mounting holes on the motherboard. Tighten the screws evenly to avoid damage. Check for any gaps between the cooler and CPU. These gaps can cause overheating. Ensure the cooler is stable and connected.
Closing The Computer Case
Once the new CPU is installed, it’s time to close your computer case. This step ensures your components are protected and your desktop is ready to use. Carefully securing your case prevents dust and debris from entering. Proper closure also maintains airflow, keeping your system cool.
Ensuring All Connections
Check all internal connections before closing the case. Ensure the CPU power cable is firmly attached. Verify all fans are connected and working. Look for any loose cables. Make sure the memory sticks are in their slots securely. Double-check the motherboard connections. A quick glance can prevent future issues.
Securing The Case Panels
Place the side panels back onto the computer case. Align them correctly with the frame. Use screws to secure them tightly. Avoid over-tightening as it might damage the case. Ensure the panels sit flush against the case. Properly secured panels maintain structural integrity.
Testing The New Cpu
After installing the new CPU, testing its functionality is crucial. This step ensures your system runs smoothly with the new component. It involves powering on the computer and checking various settings and performance metrics. Follow these steps to confirm your CPU upgrade was successful.
Powering On The Computer
Start by connecting the computer to power. Press the power button to turn it on. Listen for unusual sounds during startup. Watch the screen for any error messages. If the computer fails to start, recheck your CPU installation.
Checking Bios And System Performance
Once your computer is on, access the BIOS. To do this, press the designated key during startup. This key varies by manufacturer. It is often F2, F10, or Delete. Verify the CPU is recognized in BIOS. Check the temperature readings and ensure they are within safe limits.
After exiting the BIOS, use system tools to assess performance. Run benchmarking software to evaluate the CPU’s capabilities. Monitor the system for stability during these tests. Ensure the computer does not crash or freeze. This confirms the new CPU is functioning correctly.
Troubleshooting Common Issues
Changing the CPU in your desktop can bring challenges. Understanding these helps resolve issues swiftly. Many face errors during this upgrade process. This section addresses boot errors, overheating problems, and system instability.
Boot Errors
Boot errors often signal incorrect CPU installation. Check if the CPU is seated properly. Ensure the motherboard recognizes your new CPU. Updating the BIOS can fix compatibility issues. Double-check all cables and connections.
Overheating Problems
Overheating can occur if the cooling system isn’t sufficient. Ensure your CPU cooler is correctly installed. Thermal paste helps in heat transfer. Make sure there is enough paste between the CPU and cooler. Monitor temperature using software tools.
System Instability
System instability might arise from incompatible hardware. Verify if the new CPU supports your motherboard. Check RAM compatibility and other components. Updating device drivers may also help stabilize the system. Ensure all parts are securely connected.
Credit: en.wikipedia.org
Frequently Asked Questions
How Do I Safely Remove A Cpu?
To safely remove a CPU, first turn off the computer and unplug it. Open the case and locate the CPU. Release the lever or screws holding the CPU in place. Gently lift the CPU from the socket, avoiding bending pins.
Handle the CPU by its edges to prevent damage.
What Tools Do I Need To Change A Cpu?
To change a CPU, you’ll need a screwdriver, thermal paste, and an anti-static wrist strap. A clean workspace is essential to avoid contamination. Use the screwdriver to open the case and secure the new CPU. Apply thermal paste correctly to ensure efficient heat transfer.
Can I Upgrade My Cpu Without Changing Other Components?
Yes, you can upgrade your CPU without changing other components, but ensure compatibility. Check your motherboard’s specifications and compatibility with the new CPU. Verify power supply adequacy and cooling solutions. Upgrading may require BIOS updates for optimal performance.
How Do I Apply Thermal Paste Correctly?
Apply thermal paste by cleaning the old paste residue from the CPU and heatsink. Place a small pea-sized dot in the center of the CPU. Secure the heatsink gently, allowing the paste to spread evenly. Proper application ensures efficient heat transfer and avoids overheating.
Conclusion
Changing a CPU in a desktop is simpler than it seems. Follow each step carefully. Ensure proper tools are ready. Handle components gently. Avoid static discharge. Double-check connections before closing the case. Restart your computer to test the new CPU.
Monitor the performance for any issues. Feel free to seek help if needed. It’s a rewarding task. Boost your computer’s speed with confidence. Enjoy the improved performance. You’re ready to tackle tech challenges. Keep learning and exploring. Your desktop journey just got easier.
Happy computing!











